Introducing ISO
ISO is a common abbreviation (related to the standards body of the name) for referring to camera sensitivity, see here on Wikipedia for the full gen. In the 'old days' it used to refer to the sensitivity of the 35mm film in a camera - these days it's just as applicable, but is all handled in software and electronics, of course.
Essentially, the higher the ISO 'number' (e.g. 100, 200, 400), the more sensitive the film was, and in the modern age, the more data from each individual pixel-site on the sensor 'counts'.
Simplifying it further with a common use case, consider a concert or indoor event. Shoot a photo in the lowish (or at least erratic) light with a normal camera phone and the device has to leave the camera shutter open for longer (perhaps 1/10s rather 1/100s) than than normal in order to gather 'enough' light. The result is blur, both from moving subjects (the people on stage/at the event) and (in the 808's case, it not having Optical Image Stabilisation) blur from camera shake in your hands.
One solution is to set the Nokia 808 or Lumia 920 with a high ISO setting (say, 800). With each received photon of light counting as more significant in the overall auto-exposure calculations, the shutter doesn't have to be open for as long (and that 1/10s might be perhaps 1/40s), with far less scope for blur. The downside is that there's more digital 'noise', in extreme examples even random electronic noise in the sensor gets amplified in importance to become extraneous dots in the final photo.
For a concert photo, such noise is rarely a problem, since there are usually coloured lights and other effects firing off as well, it all adds to the atmosphere, but noise can be more annoying in other settings, which is why ISO isn't kept high all the time when shooting on 'automatic'.
Creative ISO examples
I was going to shoot a series of test photos to illustrate (ok, in this case, exagerate) the effect of changing the ISO number on the Nokia 808 and Lumia 920, but happily Siraj Hassan Mohideen has done it for me, shooting with his Nokia 808 on a tripod (for obvious reasons), so I'll include his examples and encourage you to visit his Flickr set for more, perhaps to grab the original 5 megapixel photos, for further inspection?
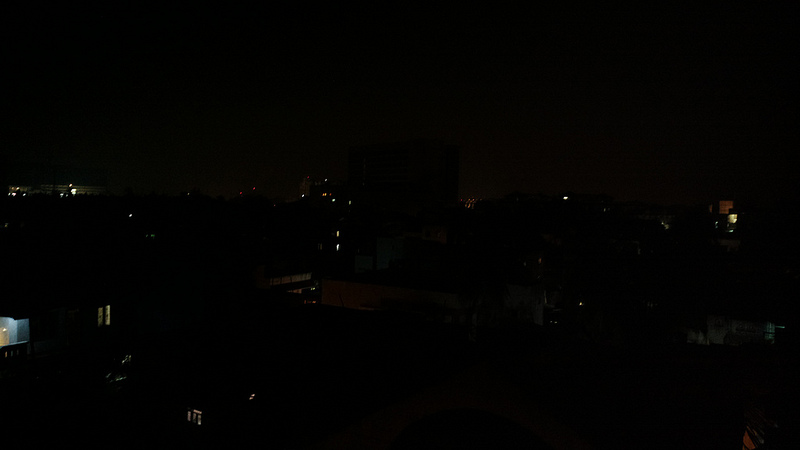
Here's the set up - a night scene overlooking a city. Very little light around, here's what the 808 sees in 'auto' mode:

This illustrates how dark it was and hopefully sets the scene for what Siraj tried next. If you were there on the roof looking at the same scene, you'd see it as slightly brighter after a while - the human eye has a wonderful 'night vision' adjustment that's very akin to ISO adjustment(!), wherein the 'rods' in your retina shift their sensitivity over a period of many minutes until they too can, in theory, perceive individual photons of light hitting a rod and firing off a neuron in your retina. (In theory. Not all of us have quite such acute night vision!)
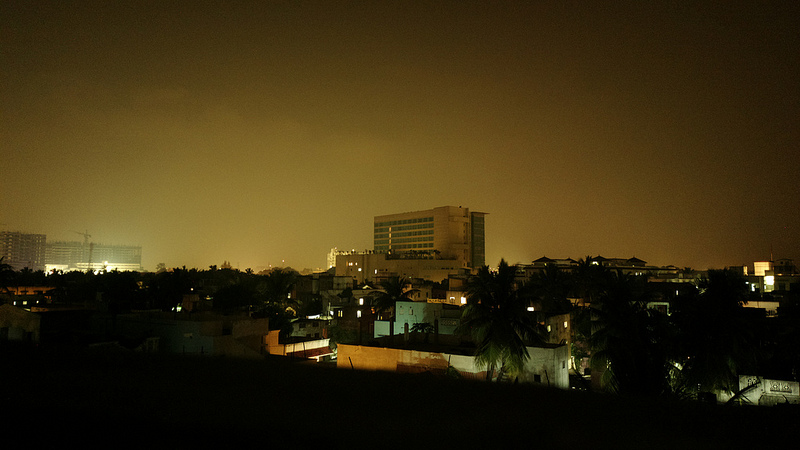
What you'd like a photo of the scene to represent, then, would be something close to what you'd see if you were there and your eyes had adjusted to the darkness. With Siraj's help, let's up the ISO number in the 808's settings (this would also work on the Lumia 920, of course) to '400'. (The phone spots that you're adjusting ISO and thus allows more leeway in exposure time, by the way.)

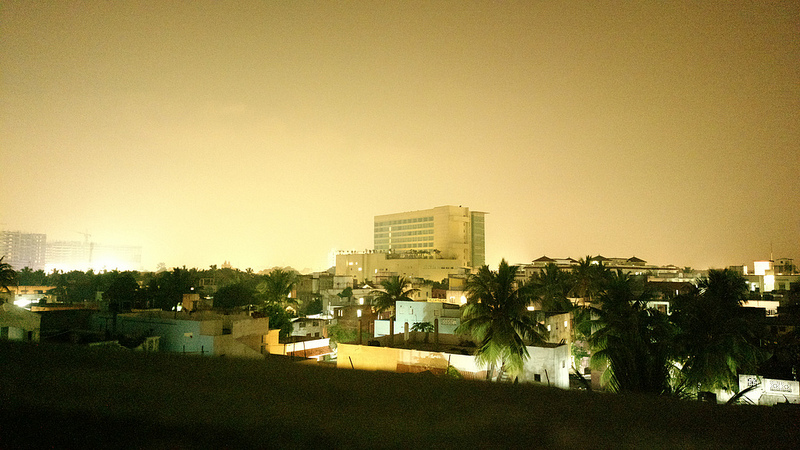
What a difference! Only Siraj could say whether this is now an accurate representation of what his eyes saw, and even then it would depend on how long he'd been outside in the darkness, i.e. on how good his night vision had become. The upping of ISO here is so dramatic that it's tempting to push the technique further. What about using ISO 1600?

Impressively, the scene almost looks like daylight, albeit with a very odd colour cast, not least because the sky and sources of light are 'all wrong'! I'd say that pushing ISO to 1600 is just too artificial and that '400' was about right, though photos are always subjective in terms of what is 'closest' to perceived reality.
Managing digital noise
Now, the example above is somewhat extreme, in that the original scene was quite dark, but it's also well chosen to try and spot digital noise in that oh-so-clean sky. Bringing up the ISO 200/400/800/1600 photos full size and cropping the top left corner gives us:

In fact, the noise is not as annoying as I thought it might be - there are quite clearly artefacts and noise when looking at this 1:1 level, but they're not obvious when looking at the whole scene.
Then there's the big question of what you want to do with the photo - if you're going to be resampling it anyway, perhaps for posting online, then the 'speckles' of digital noise will mainly be lost anyway.
Why not just 'night mode' in such extreme light-challenged situations?
Why not, indeed. Fiddling with ISO settings is a bit geeky and almost all phone cameras have a 'night' mode. This typically ups the ISO to 200 or 400 and ups the exposure too, giving much the same effect as an expert fiddler above!
In summary
Whether using manual ISO adjustment or the preprogrammed 'night mode' for extreme low light photography, the things to remember are:
- Rest the phone securely on something solid (to stop camera shake during long exposures)* - preferably use one of the many portable phone tripods
- Don't go silly with trying to get daylight photos at night - they'll look artificial. Accept that a night shot should look as if it was taken at night
- Remember that moving subjects will be blurred. You can use this to artistic effect (as here in a nice piece by Aatif Sumar), mind you!
* This isn't quite so critical on the Lumia 920 because of the OIS, but it's still a good principle to strive for
PS. I also covered getting better low light photos in video form here in the last few minutes of Phones Show 185
