The automatic algorithms for exposure, ISO, and so on, in Nokia Camera are pretty good on the whole, but they have to steer something of a middle ground, since there's no way for the software to recognise what you're shooting and to read your mind in terms of how you hope the photo will turn out.
Here's a good example. I'm shooting a steam train in the sun. Look at the sun gleaming off the polished funnel at the top of the main body of the engine, all detail is lost:

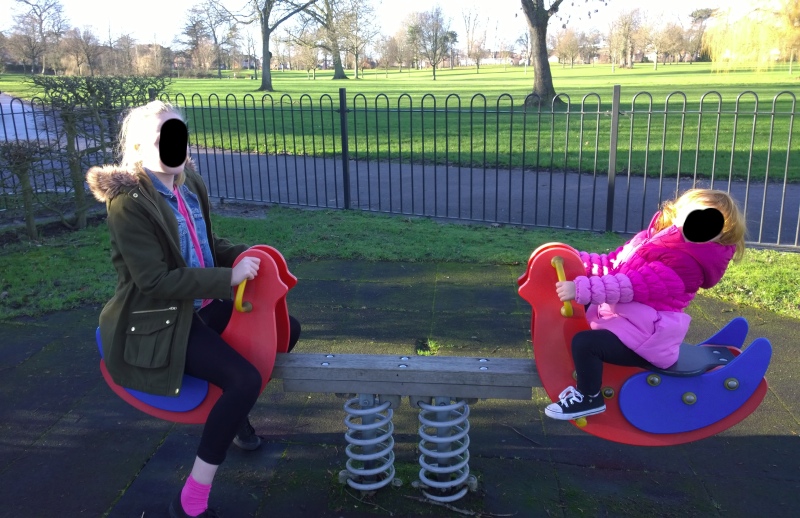
Another example, shooting family on a seasaw (faces blacked for privacy), note the late afternoon winter sun creating burned highlights on the left side of each head, with all detail lost again:

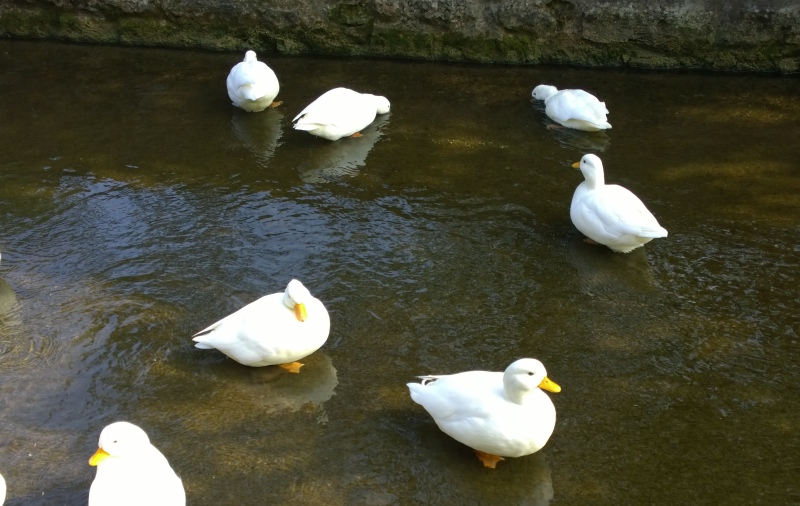
Another example, a shot of some ducks in a dark pond/stream:

See how most detail has been lost on the duck bodies?
Now, don't put all this down to me using a low end Windows Phone. The examples here are all from the Lumia 1020. The issue is that the software tries to get exposure right for the 'stuff' at the centre of the frame, the point for which focus was taken - common when using Nokia Camera on any high end smartphone, with physical shutter button. So the central detail is perfectly exposed but anything else that's outrageously bright or dark will get mishandled.
Why do bright spots get 'burned'? It's not a physical burning, of course, but the effect is the same for the image, destroying detail through the sheer number of photons of light hitting that particular spot on the sensor, exceeding the range of values that can be detected and resulting in white-out, effectively.
Now, sometimes, the detail you want is in the centre of the frame, so all this may not be an issue. But often it's not, meaning that - usually - what's actually needed is for the camera software to increase or, more usually, to decrease the exposure, i.e. cut down the shutter time to let less light into the camera body in the phone. This way, the highlights that were previously too bright to be accurately measured in the sensor are brought down 'within range'. The whole photo will obviously be reduced in brightness by the same degree, but if this is ever a problem, then it's possible to selectively lighten details that have become too dark in any image retouching package, whereas detail that hadn't been captured in the first place because it was too bright is detail that can never be recovered.
Your first thought - rightly - will be, if you have time and think of it, to flip out Nokia Camera's concentric settings sliders and knock the exposure down by a notch or two. However, this needs several taps and swipes and is even then subject to a bit of trial and error.
There's an easier way, as long as the detail that you're worried about (e.g. the family faces or duck bodies above) is at very roughly the same distance from your Lumia as any other main subjects. You see, tapping any spot in the viewfinder sets focus for maximum contrast for that spot, and also sets exposure.
So, in the example immediately above, you'd tap on a duck body explicitly. This will not only set focus precisely but will also set the exposure based on detail in the duck's white feathers. Resulting in a darker stream but lovely detail on the bird.
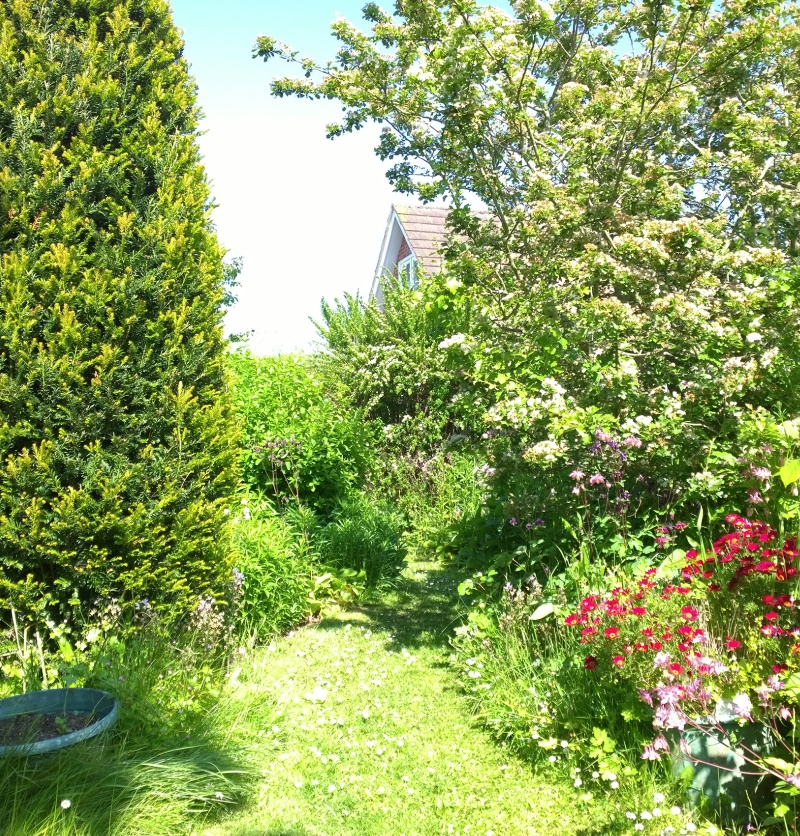
In search of a before/after example, look at these two photo crops, taken from the same spot. In the first, I've simply pointed the phone and Nokia Camera, focussed on the centre of the shot (the bushes beyond the grass, in this case) and then taken the shot:

Not at all pleasant, with the lush green grass turned to patchy white, detail lost in the flowers and the sky turned to featureless white too.
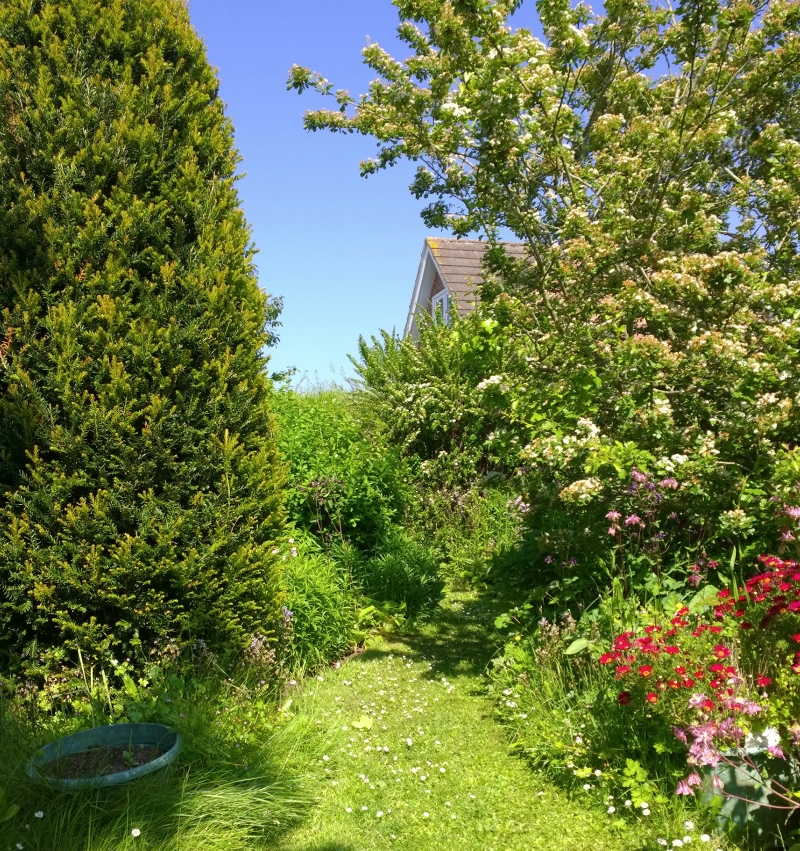
Instead, I spotted that this shot had gone horribly wrong. I could have experimented with dropping the exposure a few times, but far easier was to simply tap on a spot that I knew I wanted proper exposure for - in this case the grass just below centre of frame. Nokia Camera then took this as the area to properly expose for (and focus on), with the result that - completely automatically - the exposure was set 'just right':

The degree of adjustment is actually quite small - note the way the bushes in the centre still have plenty of rich colour. Yet the grass, flowers, sky and the scene as a whole are all vastly better.
Exceptions
Of course, there will be times when a potential 'highlight', something you're worried might be too bright, is either much closer or much further away than the primary subject being focussed on. Thus, if you focus on the highlight, you might risk the main subject being out of focus. In practice, this rarely happens, if only because the depth of field for non-macro subjects in most phone cameras is pretty wide.
The other potential showstopper is when the bright highlight is very small, i.e. glinting sunshine from a funnel reflection (in the train example), in which case, it's going to be hard for the Nokia Camera software to get an accurate focus or exposure reading. In such cases, you may have to intervene and drop the exposure manually, using the (pretty easy) interface. Go down one stop (i.e. '-1.0') at first and use trial and error.
On the whole though, the 'tap to focus and expose' is something that every user of Nokia Lumia Camera should become very familiar with - it'll pay dividends.
