NB. The full changelog for the new version 2015.423.1157.4001 is:
- Support for 4K video input with max 1080p output (on supported device models)
- Select photos and videos from OneDrive
- Change video speed
- Change caption & title font family / size / position
- Miscellaneous bug fixes
And, of course, if you have a lesser device, i.e. maxing out at 1080p video capture, or less, then the other improvements still stand, so don't switch off. The start-up steps are as before, just following your nose and prompts to get some media into a project and set a few titles and preferences:
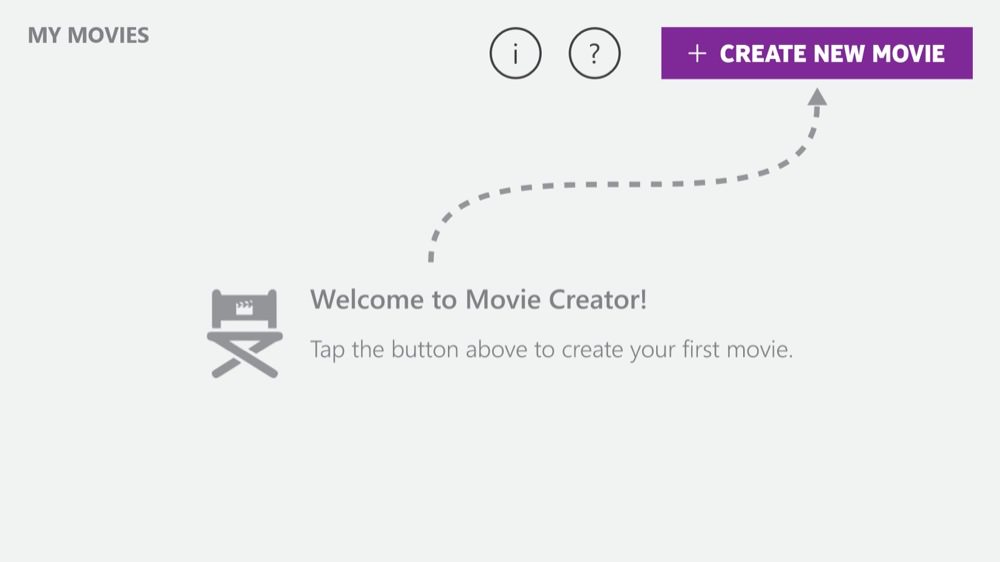
1. Getting started
Helpfully, Movie Creator gently leads you through intro screens and then into what to tap to get started. All in landscape mode throughout, so no rotating backwards and forwards:
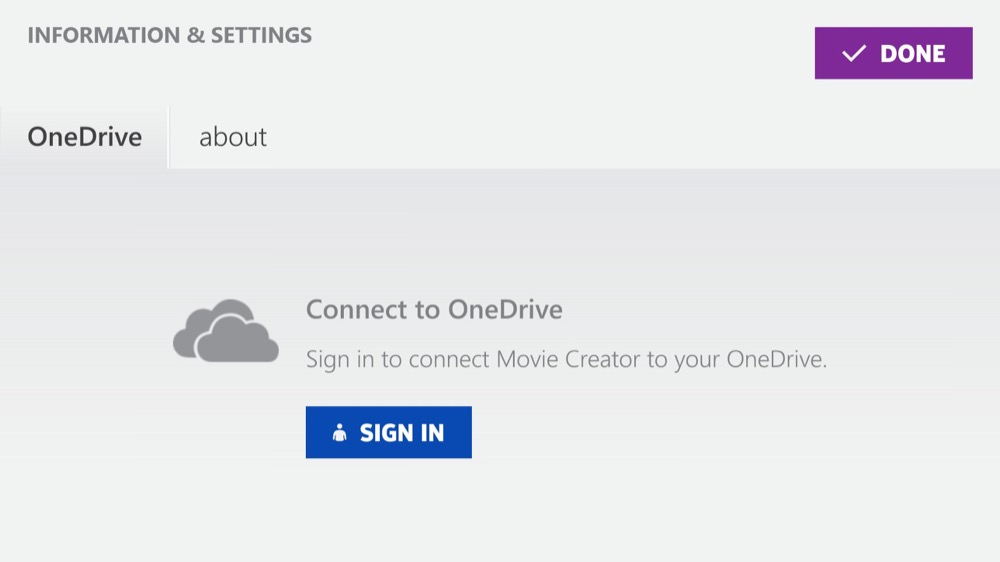
2. Signing in
One of the big new improvements is OneDrive support, and this is one of the opening prompts - take a moment to 'sign in' and authorise, as needed:
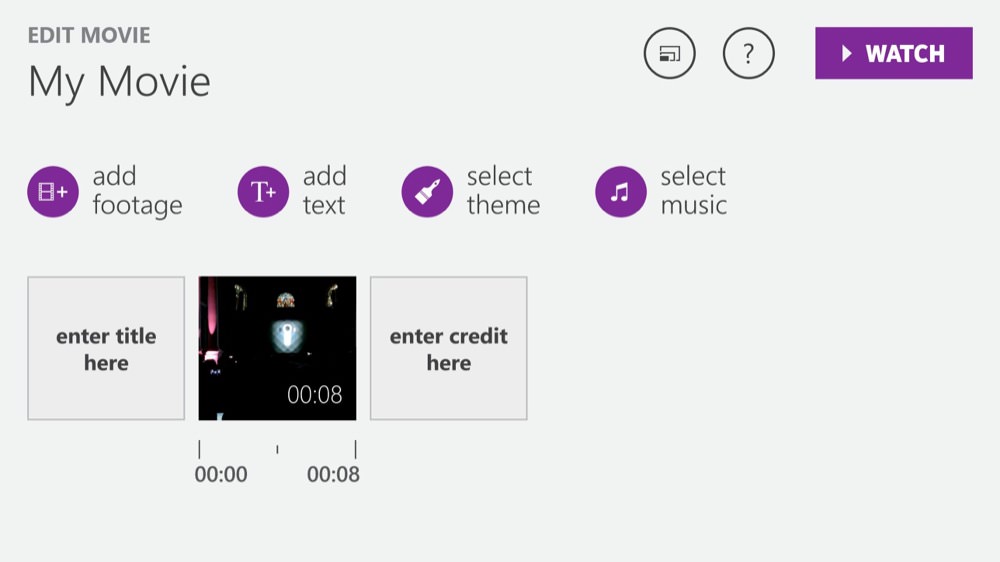
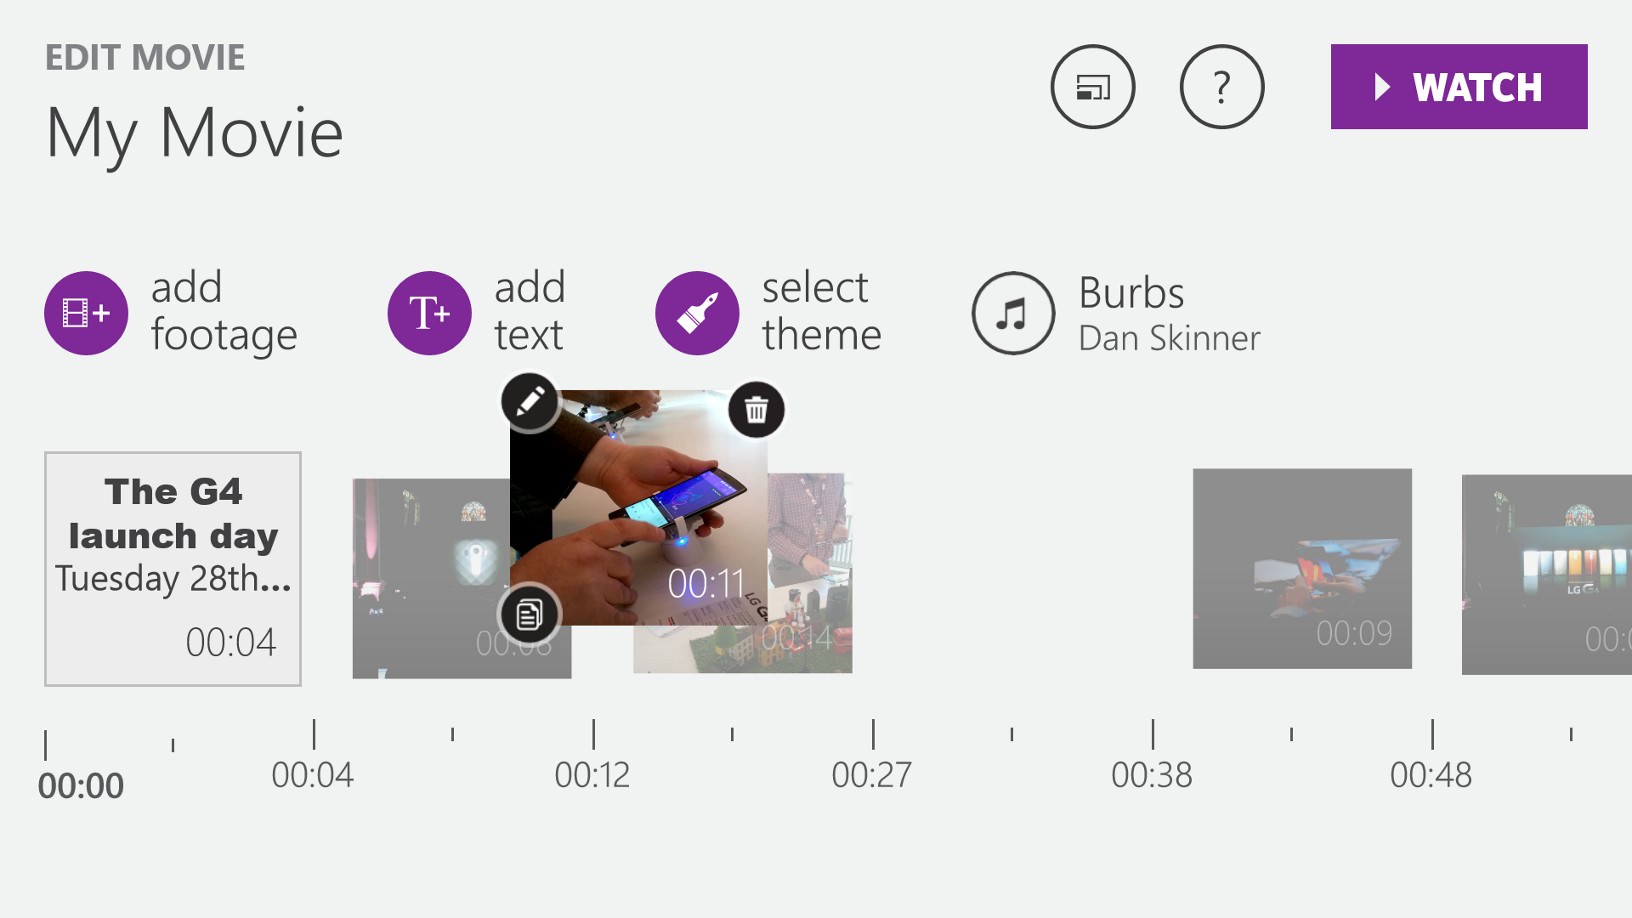
3. Main storyboard interface
The four button interface is somewhat self-evident too, but note that the bottom half of the screen becomes your 'storyboard', essentially media (videos and photos) stacked one after the other, each represented by thumbnails. And although there's no concept of inserting media at a specific point, you can drag and drop them around later, to change the order, don't worry.

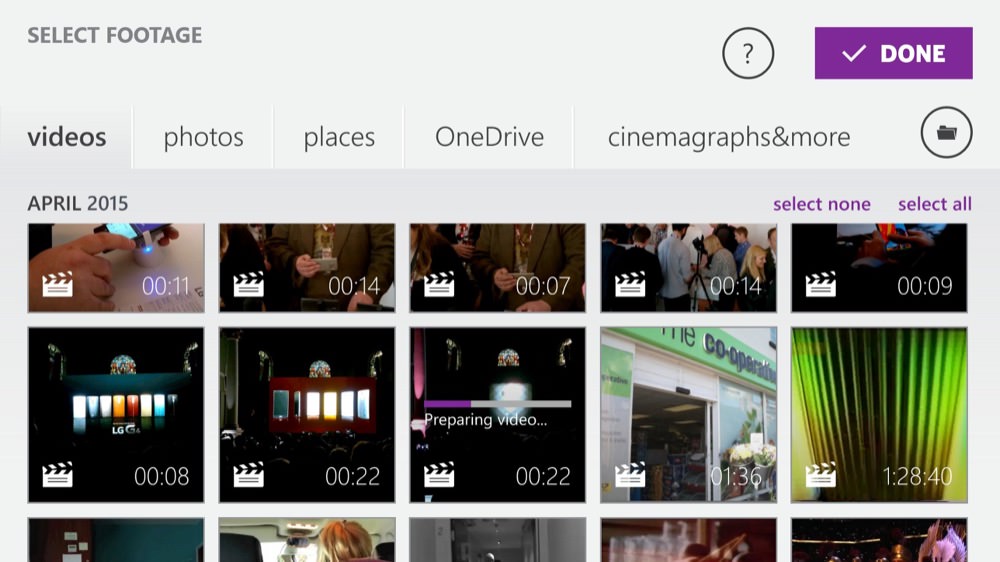
4. Picking some media
Getting to grips with the application and/or a new project, best to start with just one - or a handful - of short videos, to keep the preview time down. If you start with everything you want included, then you'll be waiting multiple minutes to be able to see how it's turning out every time you hit 'Watch'. So start small and build up as you get more confident. Note that, with this version for the first time, 4K videos (e.g. from 'Moment' video on the Lumia 930 and 1520) are supported and should appear for selection here. If you pick one of these 4K videos then you will see a short 'Preparing video' progress bar, while it's downsampled to 1080p, which is the maximum output quality from Movie Creator.
5. Trimming down
For each video included, the chances are that you won't want the whole running time, so tap on any videos in your storyboard and use the 'trim' tab to set the start and end points with the grab handles provided - the preview window on the left lets you do this accurately.

6. Building the storyboard
Similar to iMovie on the Mac and a number of other 'simplified' video editors on other platforms, the idea is to build your final movie from a sequence of titles, videos and still photos. Everything just appears in the order you determine in the storyboard view.
7. Re-organising
Long pressing any item (whether text, video or photo) lets you drag and drop it around the timeline - it's an intuitive and quick system.
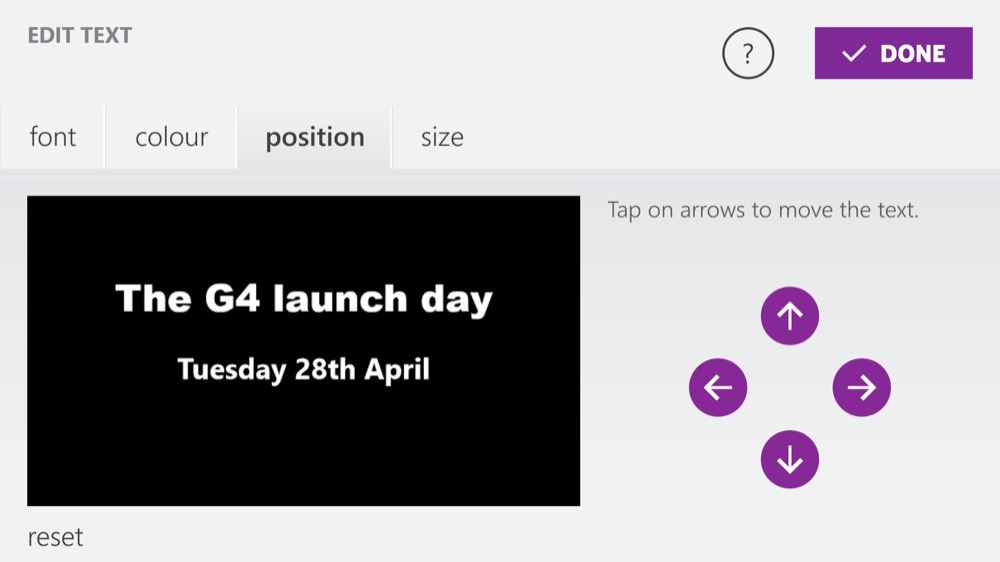
8. Customising a title
One of the other improvements for this version is terrific control over title elements. Shown below are nudge controls to move your chosen text elements, as needed, you can also change font size, face and colour! In this case, the test project was documenting a phone launch I attended (the G4, obviously).
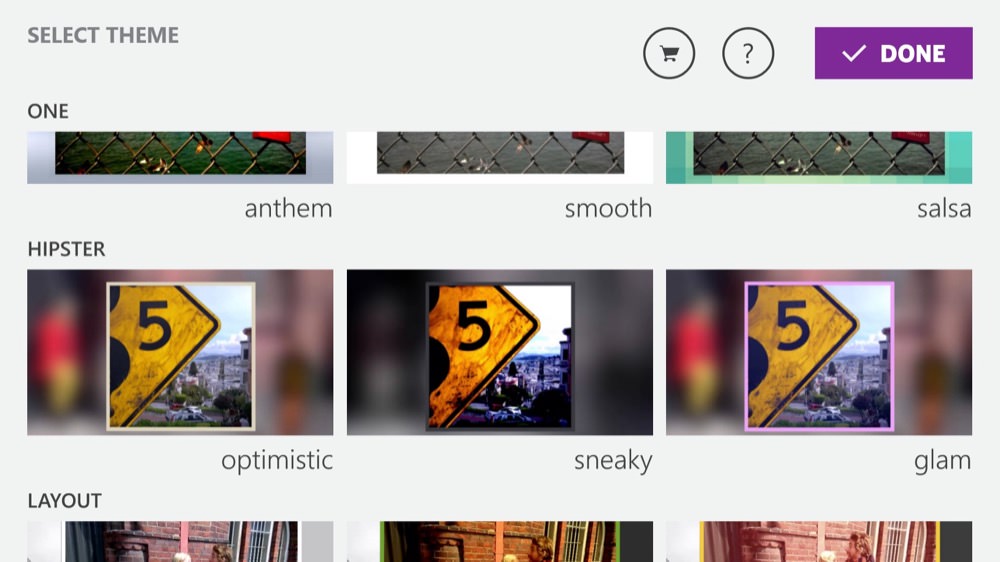
9. Themes and a warning....
Included with Movie Creator are a load of local (and online) themes, providing, typically, a 'frame', music and visual effects:
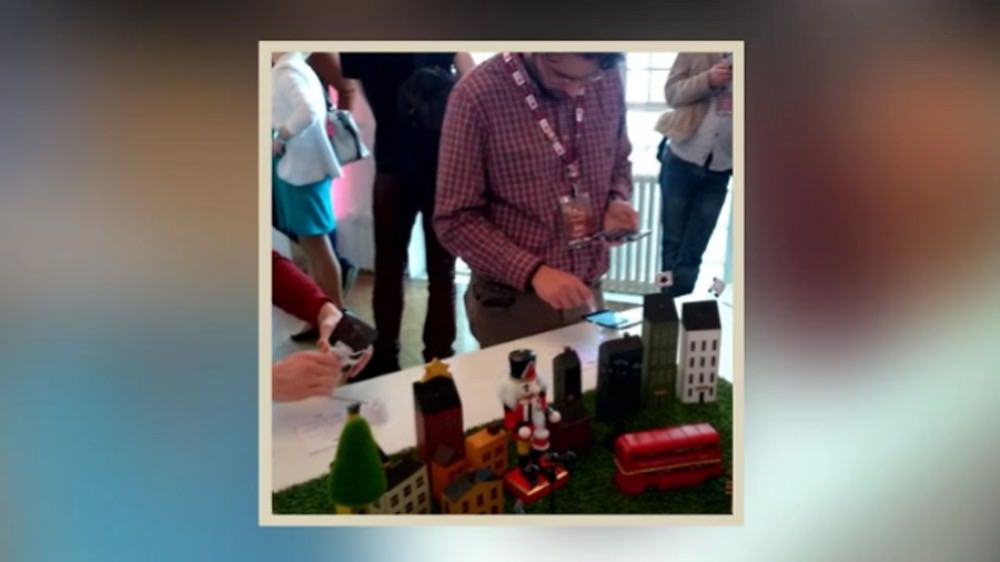
10. ...and this is what happens
Themes seem like a good idea if you have no ideas of your own, or if your media merely consists of a few squarish Instagram photos, but avoid themes like the plague if you want to see all of your content - videos and photos get shrunk and cropped to fit and the results may be 'fun' but they're usually deeply unsatisfying. Or maybe that's just me!
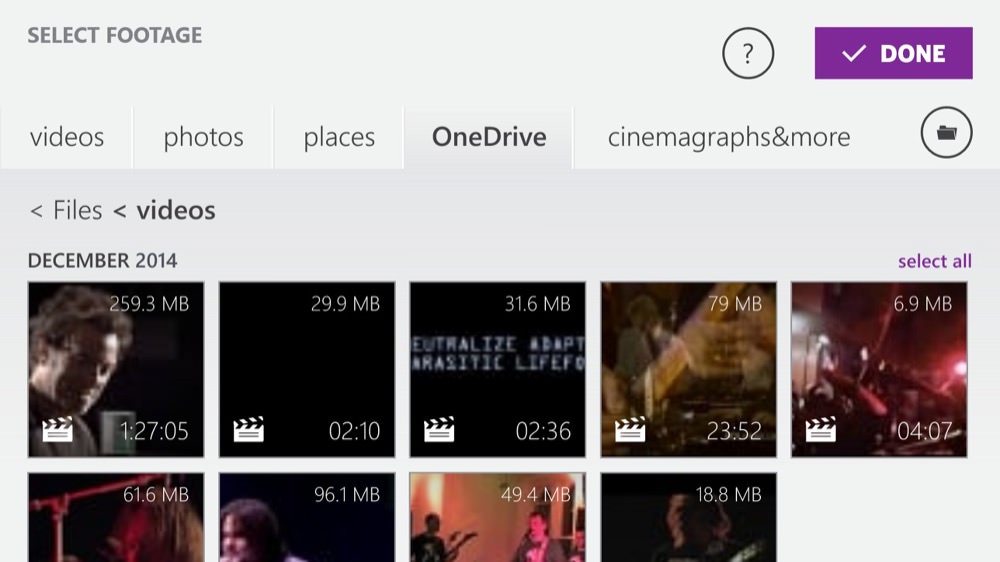
11. From OneDrive too
Remember that with this new version of Movie Creator you now have access to all your photos and videos on OneDrive from within the application. OK, you could just download them manually first with the OneDrive app, but the integration here makes it all very convenient. Anything selected (obviously) gets downloaded to your local storage before video rendering can happen.
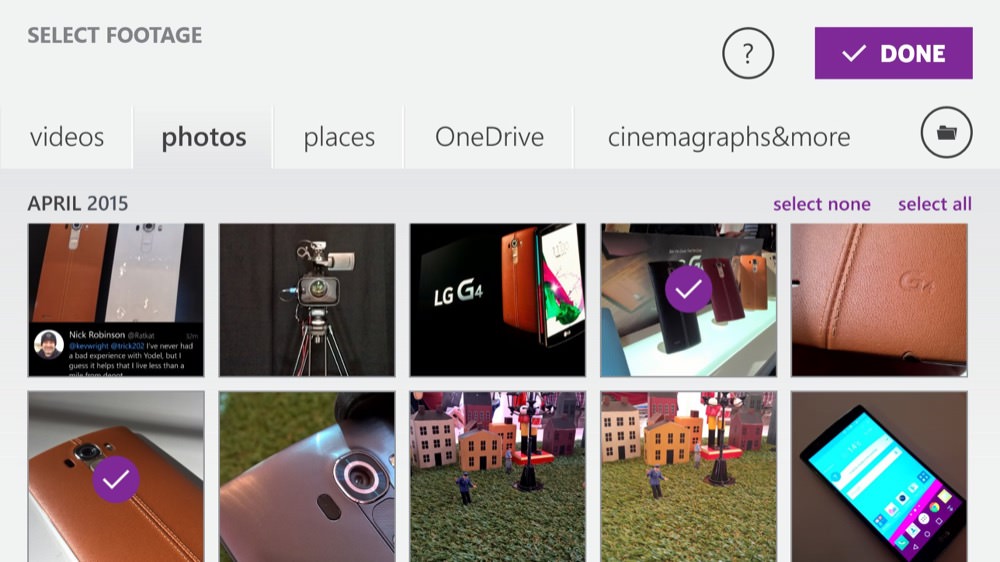
12. Photos too
In addition to videos, now that Movie Creator includes the Ken Burns (pan and zoom) effect, there's no reason why you can't include photos too - they'll be nicely animated and interesting. So why not pick some suitable images from your phone's Camera roll? As with videos, you can multi-select items, to save time. Although not shown in detail before, you can pick images taken by location too, thanks to geotagging and help from Lumia Storyteller.
13. Ken Burns effect adds life
The trick with pan and zoom is to set the Start and End points to achieve the effect you want. For example, to show a detail (like the logo below), start zoomed out and then pan across and in. Or to show how large a subject is (for example), start zoomed in and then zoom out for the duration of the effect.
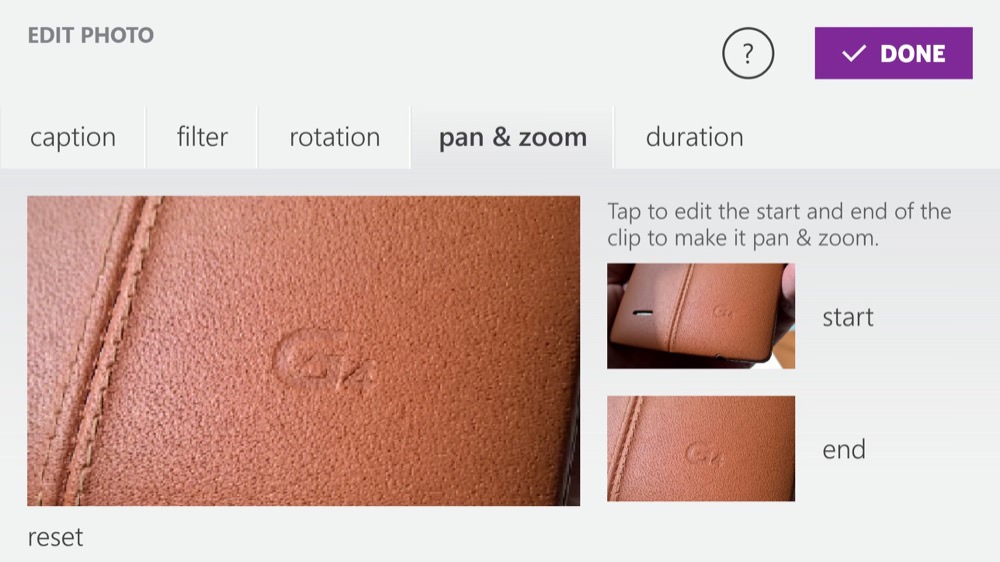
14. Controlling pan and zoom
In each case (start and end), you're taken full-screen and multi-touch zoom works, it's a very intuitive way of setting these animation end-points compared to the trickery sometimes needed in desktop video editors (which have to do without touchscreens!)

15. Setting a soundtrack
You may, of course, have sound in your videos, but even so it's helpful to have music throughout titles, stills and even ducked down behind videos, to help your final video flow. You can't, unfortunately control when the soundtrack starts or finishes, but it's still a decent implementation. You can pick any music from your local phone storage, or pick one of the bundled instrumental offerings. Slightly oddly, these are included in the overall listings, so you have to play 'spot the intruder' in your artist breakdown, so see what's shipped with Movie Creator! Also, don't just tap on the play icon to see what it sounds like, to use a music track you have to tap on the title itself so that the purple tick appears.

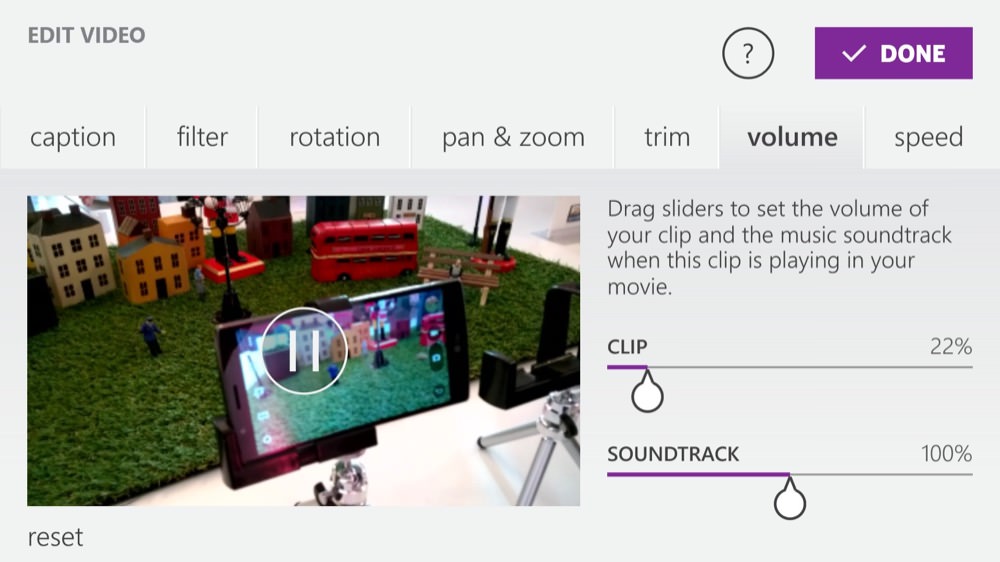
16. Controlling audio clashes
Of course, if a video clip has sound then there may be a ghastly clash of audio (or it might sound rather cool....) You can control what happens on a clip by clip basis by tapping on a video clip and adjusting the levels in the volume tab.
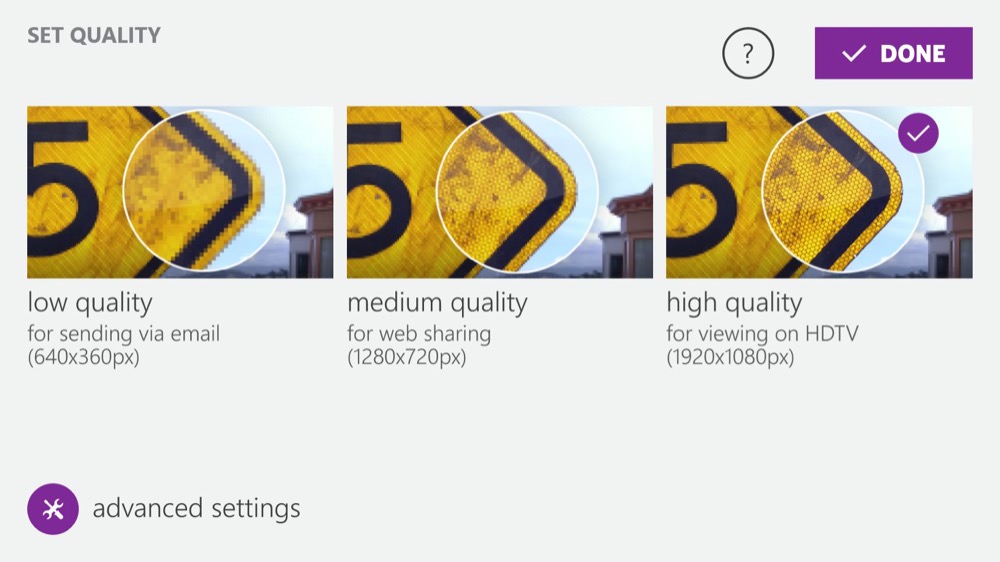
17. Previewing and rendering
It's a good idea to set quality to 'low' at first, for ease of watching and checking (i.e. much faster). You'll find this 'Quality' choice on the 'multi-frame' icon at the top centre of the main storyboard interface. Then, when you're happy with how it's all looking and sounding, pop back here and raise the quality as needed.
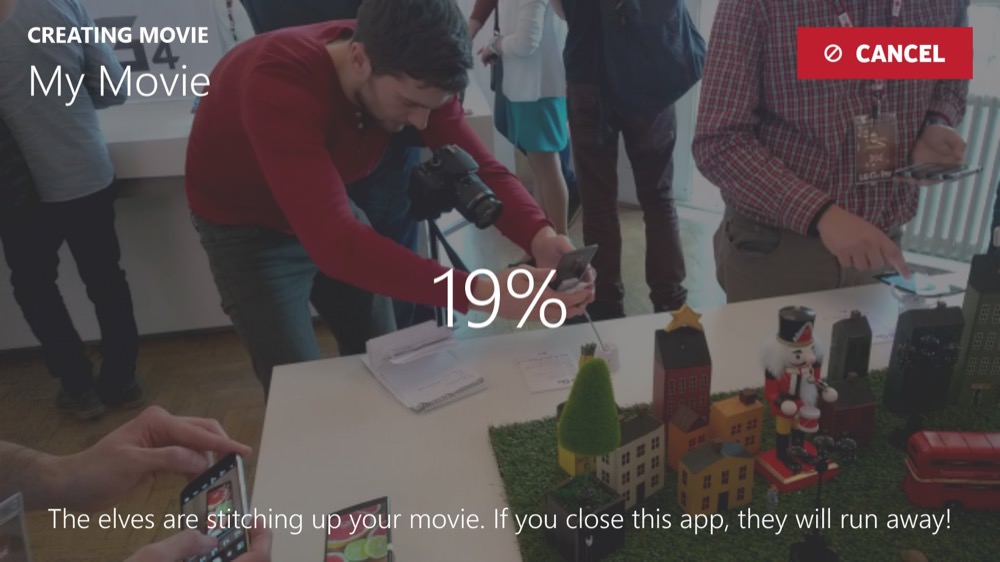
18. Final output
Usually at 1080p, your final output will be built a bit slower than real time. So a 10 minute movie might take 20 or 30 minutes to render, depending on your device and needs. Don't switch away from the rendering screen and it's a good idea to plug your device in for the duration, if you're at risk of running out of power.
Having said all that, if you do need to do something else on your phone - or answer a call - then that's fine. When you get back to Movie Creator, the rendering process will continue - just don't expect it to happen in the background in the meantime!
_________________
Of course, you'll have spotted one big limitation that still exists in Movie Creator - there's no support for transitions yet. This means that the changes between video clips can be abrupt and unpleasant. You may wish to bear this in mind when choosing what to include. It's a shame really, as transitions would make all the difference between a potentially useful little video editor and something which produces jaw droppingly good results for on-phone editing.
Movie Creator is still well worth installing and recommending though - it's polished and it's free, after all. And now you hopefully know a little more about what it can do and how you can use it!