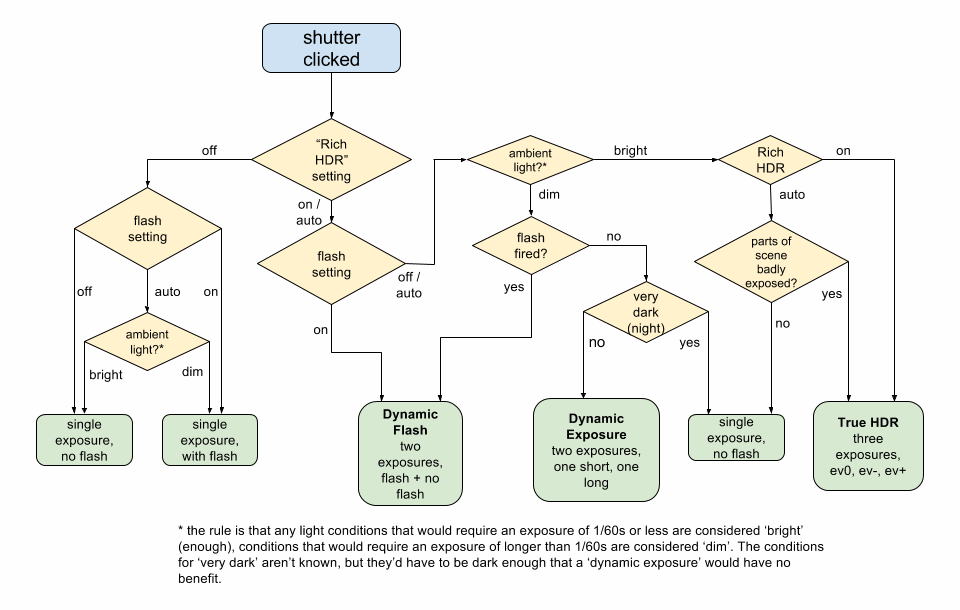
When you use Rich Capture in lower light conditions, then the system captures two images: one with short exposure time and the other with long exposure time. The final image is an intelligent combination of these. Essentially the short exposure shot is used for the moving sections and the long exposure shot for the static part. You can study exactly what happens if you turn on DNG (i.e. '8MP + 16MP DNG' in the Windows 10 Camera on the 950 range), since Camera saves both the short and long exposure time DNGs, and we can then compare them to the final camera-generated JPG.
I've taken a couple of test shots here and I'm going to use our usual interactive comparator to help you slide between the different intermediate and then final versions - this will give you a feel for what Windows 10 Camera is doing behind the scenes in order to present you or I with a better photo at the end of the day.
| Note that the interactive comparator below uses javascript and does need to load each pair of images. Please be patient while this page loads, if you see a pair of images above each other than you've either not waited long enough or your browser isn't capable enough! You need a powerful, large-screened tablet or a proper laptop or desktop. This comparator will not work in IE or Edge on Windows phones. Sorry about that. |
As my first example, a car, moving at around 20 mph at dusk (note the headlights).
In case you want to grab the original final JPG, here it is, from the Lumia 950, click the link to download. What we're interested in here though are the stages to get to this, so here are the (slightly scaled, to fit the page) intermediate short and long exposures, gleaned from the underlying DNG files, just wait to make sure the page has fully loaded and then use your mouse or trackpad pointer to compare the images:
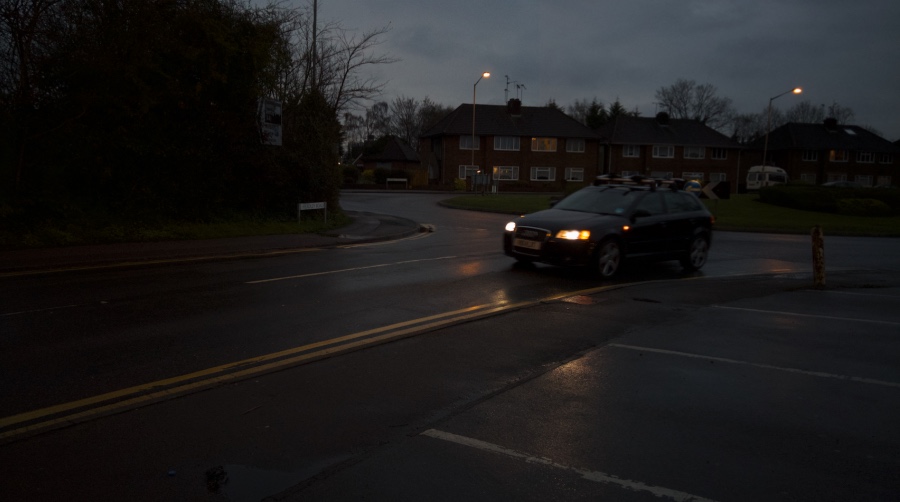
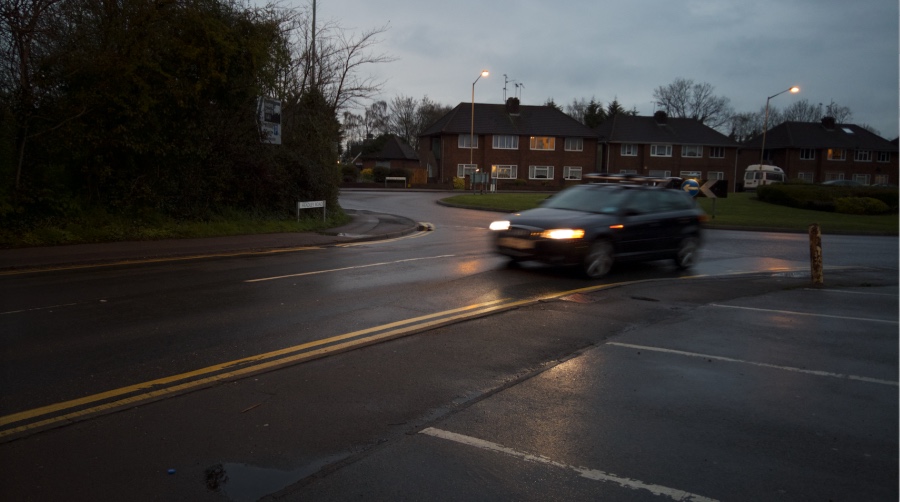
As you'd expect, the longer exposure sees more blurring of the moving car, while the shorter one freezes motion better but with a much darker shot. However, to my eyes, the overall scene was lighter than either of these 'RAW' intermediate images, there's a preview of a lightly processed longer exposure available if you tap through quickly on the 'last image' (top left) thumbnail:
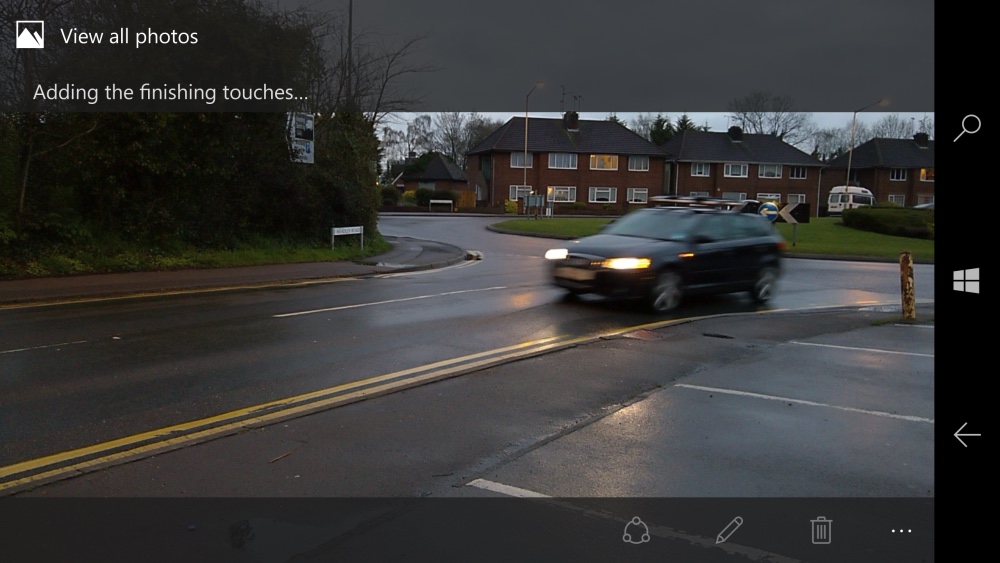
But it's clear that Windows 10 Camera's processing needs to get to work - and this takes anywhere from five to ten seconds, depending on device and conditions. But the result is worth it.
In order to show how well it does, I've included another comparator, this time with a scaled version of the final default result from Windows 10 Camera's 'Dynamic Exposure' (automatic) processing, set against the longer of the two exposures above:

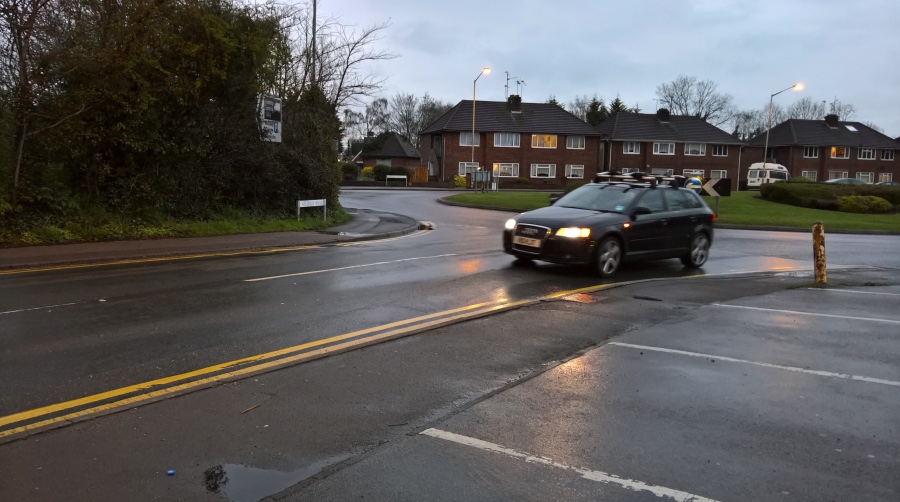
Impressively, the light levels have been restored to what they should be (as measured by my own eyes) and parts of the shorter exposure now make up the moving 'detail', while the greater information from the longer exposure is used to help construct everything else.
Impressive, eh?
Here's another example, this time snapped by a friend and thus not under the control of (ahem) my own steady hand. I was sitting in the driver's seat with just the very weedy cab light over my head and to my left. Very low light levels again and naturally (being an animate object) I wasn't perfectly still. In fact, I was deliberately moving, talking my friend as to what to tap on an unfamiliar phone(!)
I'd turned flash off, by the way, because of what I'm testing here - in a real world photo you'd have flash set to 'Auto' and it would have fired. But I'm saving some flash analysis for another article in the near future...
Again, in case you want to grab the original final JPG, here it is, from the Lumia 950, click the link to download. What we're interested in here though are the stages to get to this, so here are the (slightly scaled, to fit the page) intermediate short and long exposures, gleaned from the underlying DNG files, just wait to make sure the page has fully loaded and then use your mouse or trackpad pointer to compare the images:
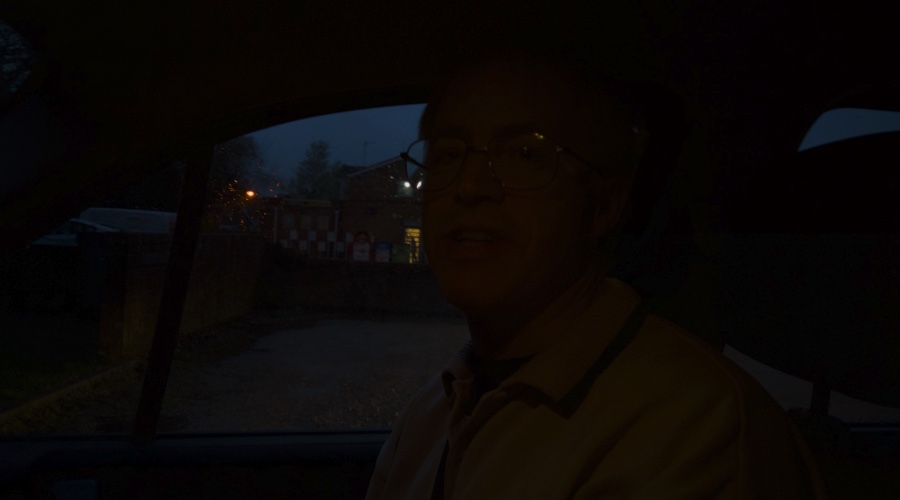

Again, both are far too dark, and darker than I'd have expected, but again remember that these are intermediate images from DNG files. Again, in order to show how well Windows 10 Camera does, I've included another comparator, this time with a scaled version of the final default result from Windows 10 Camera's 'Dynamic Exposure' (automatic) processing, set against the longer of the two exposures above:


Again, the blending of information from two images/exposures, along with white balance and other processing, means that a useable (and pretty accurate) photo is produced from what should be something of a blurry mess.
Your comments and examples welcome, of course. The big takeaway here is that you don't have to lift a finger - you can leave Camera set to either 8MP or 16MP (i.e. JPG) and as long as 'Rich HDR'/'Rich Capture' is set to 'Auto' then this Dynamic Exposure action and processing will leap into action automatically and provide you with a better shot that you might have expected!
PS. That previous Rich HDR (Rich Capture) graphic of mine in all its glory, for ready reference:
