Let's start with the basics - to focus a camera you have to change the distance between the lens (which, for the purposes of simplicity here, we'll consider as a single optical element) and the sensor (or, in the old days, film). As the lens is tracked in and out the distance of objects which are in perfect 'focus' (i.e. all the light rays from a specific point converge on a single spot on the sensor) changes - looking at the output (e.g. on a smartphone screen) you see the various objects in the frame going from blurry to crisp and back to blurry again.

(image from How Stuff Works)
With me so far?
The default auto-focus works by looking at either the centre of the frame or the object in the frame that you tapped on and then varying the lens position and monitoring the contrast - focus is obtained at the maximum of the latter. Subtleties are added for 'phase detection' auto-focus (e.g. in the Lumia 950), but we don't need to work about that here. Suffice it to say that you tap on something, e.g. the landscape around you, and the lens position is adjusted backwards and forwards around the point of maximum contrast, quickly homing in on what should be the correct focus.
Now, Lumia Camera, or Windows 10 Camera (depending on device and OS version), have a 'pro' mode that I'm sure you've played with. In this, there's a 'focus' ring (the icon is a square inside a circle) in the UI. Tap on this and you can vary the lens position (and thus focus) manually just by swiping up and down.
What's interesting is that right at the top of this arc/slider is a position for 'infinity', marked as '∞'. I'll come back to that in a moment. For now, note that leaving this focus on this will result in a decentish photo of landscapes, but rarely as crisp as you'd like. Here's a good example, snapped on my Lumia 950, with both tapped autofocus and manually-set infinity focus. Use your mouse or pointer to compare the two image (1:1) crops in the usual way:
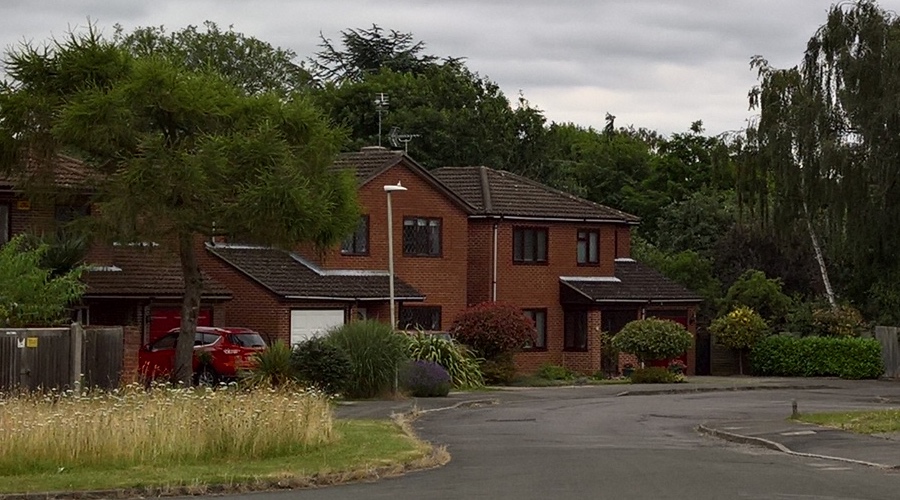
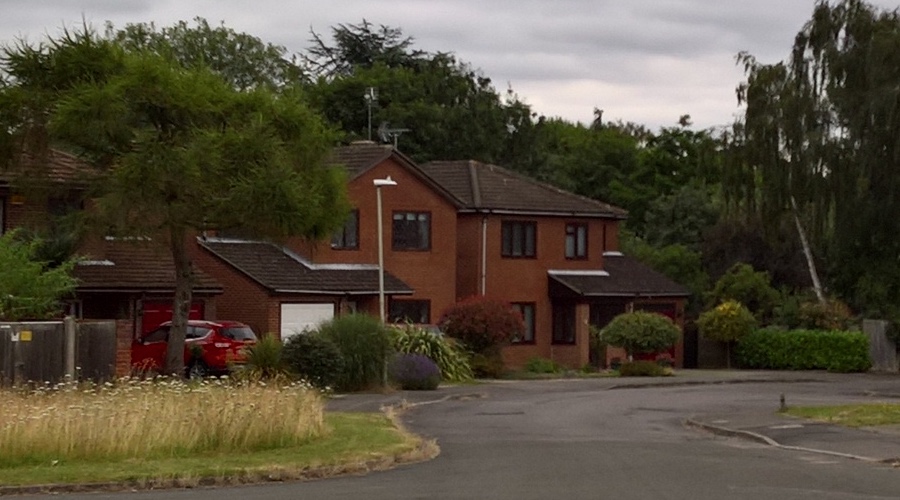
There's not that much difference, bearing in mind that these are small central 1:1 crops from 8MP images, but I hope you agree that the manually-set 'infinity'-focussed image isn't quite as clear and crisp. If we're going down the photo purist route then it's right to hold your hand up here and ask what's happening.
Look at the chart below, showing approximate focus distance for each physical lens position in the phone camera. And yes, the entire range of the latter is only a couple of millimetres in real life - we're talking micro-miniaturisation here!
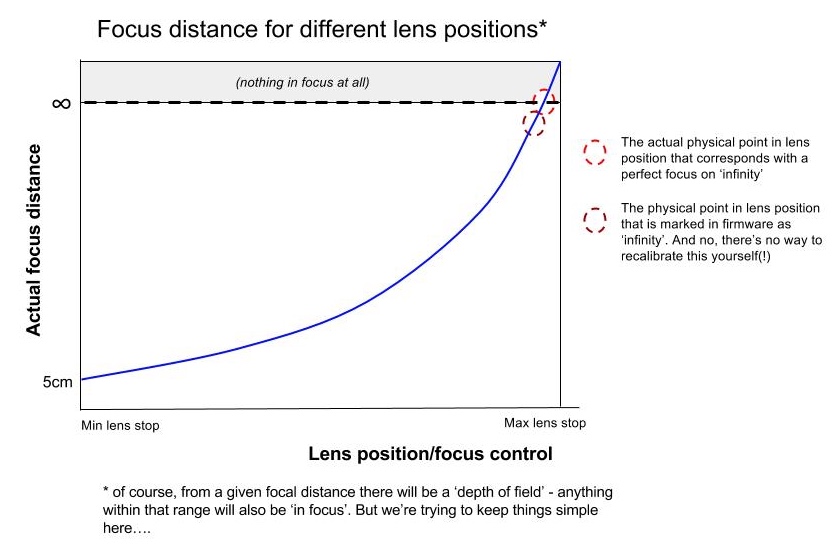
Think about it - what actually happens inside the phone camera when you select '∞' in the manual focus part of the 'pro' interface? The camera firmware gets the instruction 'move the lens to where it's supposed to be for an infinity focus (e.g. as when tested in the factory or from the design specs) and the tiny motors dutifully move the lens there.
And, for most people, most of the time, this is fine, it's close enough. It's certainly in the right region and, as above, you have to look very closely indeed to spot that something's not optimal.
However, as the chart shows, the pre-programmed '∞' lens position isn't always 100% spot on. Either because of manufacturing variances (and we're talking tiny offsets here) or because something has changed with time or temperature. For whatever reason, a preset lens position is now no longer appropriate.
This is the ONLY preset position in the firmware though. In practice, 99.9% of your photos will be taken with auto-focus doing what it's supposed to, honing in on the lens position that gives the sharpest, most contrasty image for your chosen object/area in the viewfinder. In effect, it's working this out in real time, every time.
In daylight hours, it's trivial to take landscape shots in the time honoured way, either by leaving everything on full 'auto' and letting the auto-focus find something in the distance to latch onto, or by tapping on something interesting. So, for example, if the landscape is a mass of green fields and there's no real detail or contrast at that distance to do the calculations on, look for a post or a tree or even a cloud, anything in the viewfinder (screen) that can be tapped on and used for the auto-focus contrast calculations.
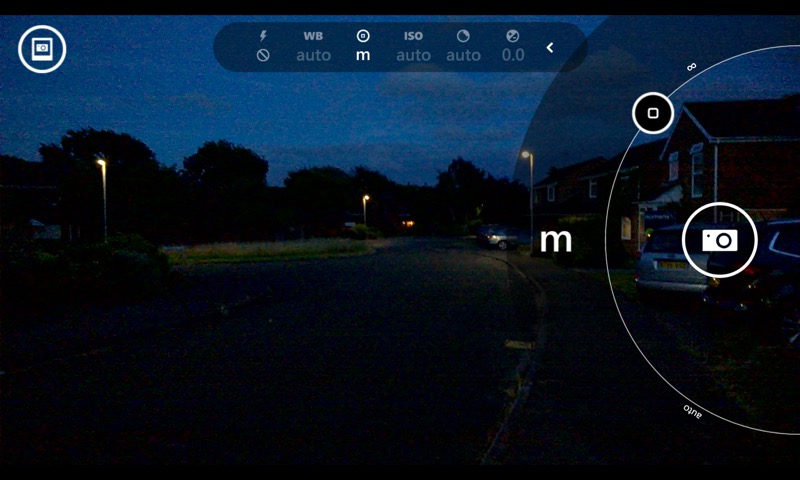
At night, landscapes do get trickier with many phone cameras - and the Lumia range are fiddlier than most. With far less light entering the lens and with far less information to go on (from a distant object), you can see why the auto-focus (and even PDAF) routines struggle. The trick is to use that 'pro' mode, as charted above, but ignore the '∞' preset. Instead, vary the focus manually until you get to the lighter red circle in the chart above, the point in the arc (in the UI) where the distance looks sharpest on your phone screen, i.e. to your eyes - heck today's phone screens are now well up in the Megapixel range, so your eyes can be a pretty good judge of what's going to turn out well - no more squinting at low res QVGA previews (as in 2007)!
PS. Interestingly, you can see the full range of lens movement when varying the focus position in the manual mode - as you track the lens position back, away from the sensor, you'll see the landscape (for example) come into (true '∞') focus and then go blurry again. This second area of blurriness is beyond any focus position, the lens is now too far from the sensor, which is why I shaded out this extra part of the focus range in the chart - here, nothing at all will be in focus, however far away from you it is. As you move the slider further still, to the actual '∞' position, the lens then gets shunted back to the preset mentioned above (whether 100% correct or not).
PPS. Bonus snap below of the Lumia 1020 camera in various bits, including a cut-through showing the structure of lens assembly and sensor:
