Microsoft's challenge, of course, was to be able to let the user leave everything on 'auto' and leave the software to make all the decisions about flash, bracketing of shots, ISO, exposure, and so on. And, to be fair, this largely works and many of us have got some great images as a result. But there are some aspects which users do need control of, notably the ability to force HDR 'on' in order to achieve a particular artistic effect (think sunsets). Plus the decision process about whether to disable flash, based on how far away the focussed subject is - I'd still like to see this included into the workflow below, if Camera knows it's focussing on something more than a few metres away at night then what on earth is the point of firing the flash? And then there's the whole 'focussing is rubbish at night anyway' issue. Another tutorial for another day though...
Here then is what I/we believe happens when you take a photo with Windows 10 Camera:

As you follow the logic above, it becomes clear that there's a lot of common sense - multiple exposures aren't used if a single one will do, unless overriden (e.g. Rich HDR 'on'). Possibly the most interesting outcome of the workflow is flash-less shots in dim ambient light, where 'Dynamic Exposure' comes into play, taking two photos and using the long exposure version for the body of the image, keeping noise levels down, while merging in any specific details for moving subjects from the shorter exposure. Indrek and I have done many tests on this and the system works quite brilliantly - we've been unable to 'spot the joins' for the blending of the two images.
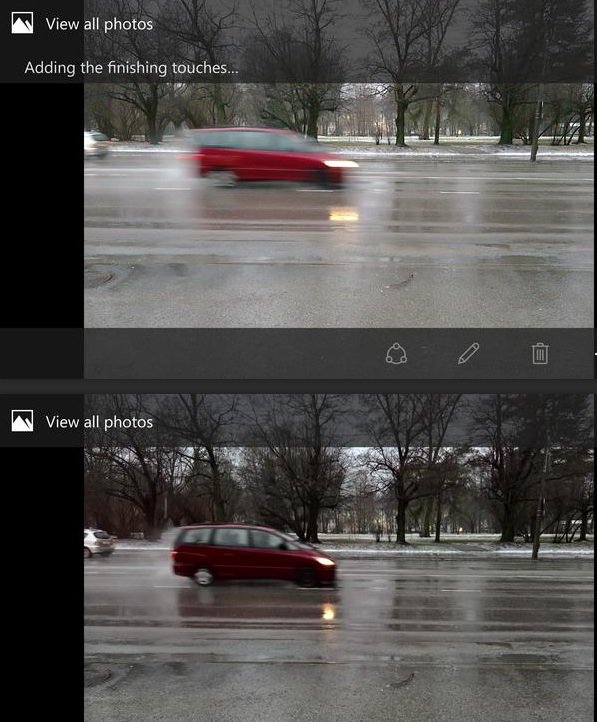
An example of Indrek's, of a car speeding by in low light, here screengrabbing direct from the phone - you can see the effect yourself if you snap a moving subject in indeterminate light - tap through quickly on the top left circular thumbnail to view the photo just taken and you'll see the 'long' exposure used while 'finishing touches' are added. There's then the blending in of detail from the shorter exposure (e.g. the car here) and all manner of white balance and other improvements before the final image is created.
Aside from the Rich HDR and flash settings in the UI, the main decision points relate to specific light level thresholds. Being low enough to trigger an exposure of more than 1/60s qualifies as 'dim', and I'm guessing the threshold for 'dark' (i.e. too dark for Dynamic Exposure) is around the 1/10s mark. But if you're a camera phone shutterbug too and can shed more light on any of this then do please comment.
