Note that since my original feature, back in early 2017, the Insiders programme from Microsoft has ceased for phones, i.e. for Windows 10 Mobile. From Spring 2018 onwards, your phone is only guaranteed monthly updates if you've successfully left the Insiders programme and are fully on production again. Just thought I'd mention that.
If you get stuck going back from an Insiders build to 'production' status, the last resort is to use the (Win32) Device Recovery Tool (DRT). You can grab this for yourself here if you don't already have it on your Windows 7, 8 or 10 system.
The feature here assumes that you have a more or less fully working phone, are on production status,and simply want to get that last 5% of performance, or want to knock that annoying glitch on the head. It's the infamous 'Litchfield refresh' sequence!
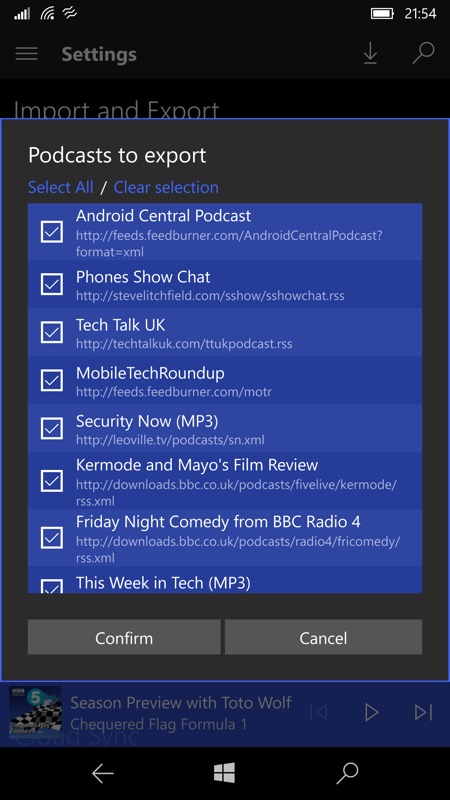
1. Export your podcast feeds
Go into your chosen podcatcher (and yes, I need to add Podcast Lounge to that feature ASAP) and clear its storage/cache of MP3s (since you don't want these to be needlessly backed up - they can always be downloaded again afterwards if needed). Now the important bit - make sure that its feeds and/or database are backed up - this usually happens within the app to OneDrive, but you may have to upload a file or two manually (e.g. in the ubiquitous OPML format) - it depends on the app (Grover Pro is shown below).
2. Back up
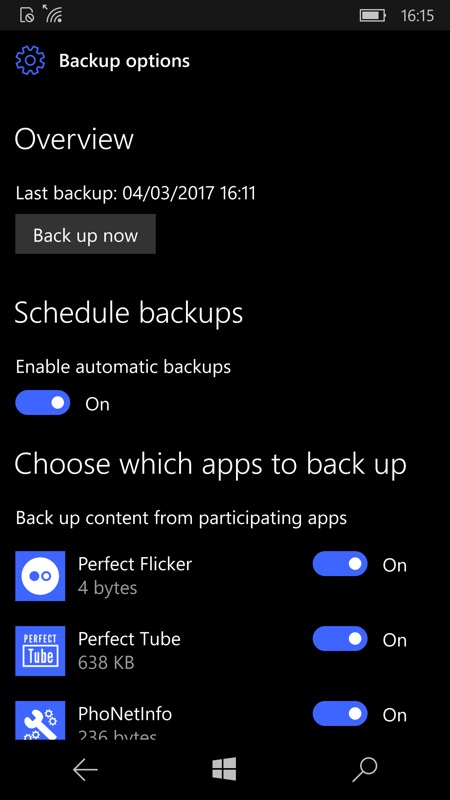
Check you do have a full backup: go into Settings/Update & Security/Backup, and make sure both toggles are on ('Back up content', 'back up settings'). Now tap on 'More options' and wait a few seconds (up to 30, if you have a lot installed!) while the information is retrieved from OneDrive. Check that 'Last backup' time and date is recent (e.g. within last 24 hours).
Also, check that backup is toggled on for all installed applications (see screenshot below) and perhaps consider doing an extra 'Back up now' (and then wait, this can be many minutes, again depending on how much you've installed, on which apps they were, on the speed of your connection, and on the time since your previous backup!!!)
3. Finish your games
You will lose game states in many cases, so finish off that tricky title and draw a line under it before moving on?
4. Check you know your passwords
The usual precautions about double-checking that you have any relevant passwords (e.g. Microsoft, Google, Dropbox) to hand, to save messing around with recovery emails later! It doesn't matter if you keep them in a secure database app on another phone or computer, or in a cloud utility, or even just write everything down on a piece of paper and keep it somewhere safe - just as long as you don't trust your own memory!
5. Save your Start screen layout
A bit of a 'belt and braces' hack, this, but just in case the auto-restore of this doesn't happen (it should!), screenshot your current preferred Start screen layout (power+volume-up button), repeat for each screen's worth! Upload the resulting images to OneDrive (either manually or check that they made it automatically) or share them with yourself via email attachments, etc.
6. Photos, PIM up to date?
Make sure that all of your latest photos are synced up to Microsoft Photos by going into this and hitting the 'refresh' control. You don't want to risk losing a valuable recent photo!

Note that as I write this there's a continuing issue with Photos not showing up older photos from other Windows devices, but a) this should be fixed in time, and b) the issue doesn't affect the uploading of photos, so your images should be safely in the Cloud.
Ditto for Outlook Mail and Calendar, do a final sync to make sure any latest phone tweaks to PIM data are synced up to the cloud.
7. Take out your SIM if you're expecting a call
Take out your SIM card and put in something else for the time being, if you're worried about not being phone-able for a few hours! You will need this downtime, not least for the large downloads and installations below!
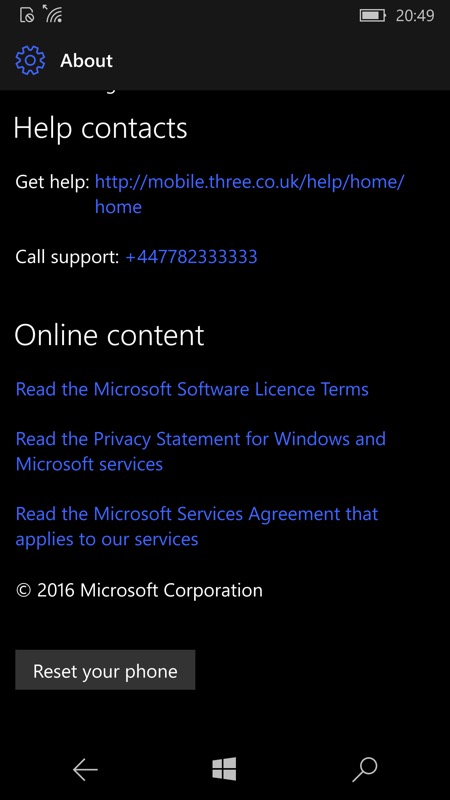
8. Reset time
Head into Settings/System/About and scroll down to the 'Reset your phone' button. Tap this and confirm, to set the phone erasing itself - this will take several minutes, so be patient.
9. Signing in
You'll be faced with a smartphone that's showing the typical set-up screens: choosing country; accepting Microsoft's EULA; setting the date and time; selecting a Wi-fi network; agreeing to go 'Express' with default settings. You'll be familiar with all of these and it's not rocket science to work through.
Next is being given the chance to 'Sign in' and you should definitely do this. Give the phone your Microsoft account email and password and tap 'Next' to get the OS looking in your account's online (hidden and quota-free) backup area. The right and most recent backup (e.g. with today's date, if you did the manual backup step above) will hopefully be highlighted in blue, but do double-check it. You may (depending on how you set up your Microsoft account) also be asked to complete two step verification by one of your chosen backup methods (e.g. code sent by SMS to your nominated phone number).
10. Restoring your settings and data
You're now faced by a number of restoration steps. The first involves a progress bar and should take about ten minutes - you might also be asked to confirm your details again at around the 20% mark, depending on which OS version/branch you're on.
Next, step through the agreements for OneDrive and Cortana. Windows 10 Mobile then helpfully gives some hints along the lines of being patient in terms of the app installs. Which proves to be apt advice - you may think you're nearly there but in fact you've still got at least an hour of background application installs to (lightly) supervise.
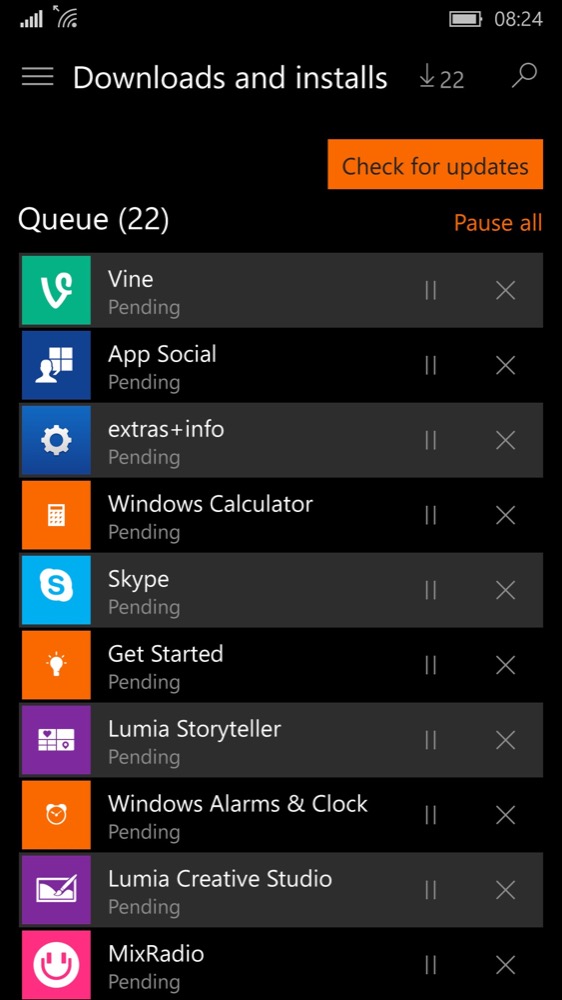
11. Re-installing and updating applications
Head into the Microsoft Store app and look on the menu for 'Downloads and Updates' - tap this, then on 'Pause all'. Now, scroll through the long list of updates waiting until you come to the Store itself. Tap on its download icon and update this first, for a smoother ride overall! The Store will update and terminate and then hopefully restart itself. If it doesn't, then just launch it again. Head into 'Downloads and Updates' again - this time tap on 'Check for updates' if need be, and you should see around 40 or more updates waiting.
At this point it's safe to simply tap on 'Update all' (if they're not already auto-updating) and then go off and do something else for an hour or so. True you could insert your SIM at this point and use the phone for the basics, but I'd advise against it - your phone needs to be on Wi-fi and relatively undisturbed - it's doing a lot of installation work and will be slow and (probably) hot during this phase. So best leave it alone to get on with it.
Really.
12. Final checks
Once everything's installed and settled down, power down and insert your main SIM, then power up again. When the Start screen appears (and hopefully more or less as it was when you started this refresh!), run through the basic applications to make sure that your PIM data syncs all happened OK. So that's Outlook Mail and Calendar - is everything restored/synced and in place? Use the 'Refresh' tool in each if not. And again - be patient - syncing 1000 contacts with the Cloud takes longer than you think, even in 2018. In some cases, I've seen contacts not appear for many minutes after the initial sign-in and boot up.
You'll want to head into your podcatcher too, importing all your shows/feeds from wherever you saved your exported list above, and then downloading shows as appropriate.
13. Missing applications
It's notable, mid-2018, that a few select Windows 10 Mobile (and Windows Phone 8.1 applications) aren't in the Store anymore. Sometimes the developer just removes the listing, in which case the auto-restore should still be able to install the application directly, even without the official listing.
In a few other cases, for whatever reason, the developer may have physically removed their application from Microsoft's servers - and it's here that you may have a favourite application or two which won't now appear and may even leave an unsightly hole on your Start screen. The solution, as you might guess, is to go looking for an alternative application that does a similar job, which is normally not that hard, or perhaps to seek out a web-based equivalent to the application. Check this in Edge and then think about packaging it for your Start screen with the PAWA utility.
Phew!
Don't be too disheartened by how many steps I've broken all this down with - although the various steps take quite a bit of real time while data shuttles backwards and forwards, there's not much for you to do and there's nothing too tricky.
Comments welcome if you feel the need to try all this - how much slicker does Windows 10 Mobile seem now? How much of a difference did the refresh make?