Image capture and processing
Let's start with the basics though. In general, and I'm simplifying a little for ease of understanding here, when a phone camera snaps a shot, the sensor's RGGB (Red/Green/Green/Blue) pixels are Bayer-filtered (averaged to recognisable colour patterns) and the result is a temporary raw (usually capitalised in imaging circles to 'RAW') image in the phone's RAM. This contains the original Bayer-filtered pixel data, i.e. luminosity and colour for each physical/virtual pixel.
Now, in most cases and most phone cameras, this RAW image is then processed in various ways. If multiple exposures are called for (e.g. in a HDR shot, or just in a stacking system, as on many modern Android and iOS flagships) then other RAW images are brought in too, combined in clever and algorithmic ways to:
- reduce noise
- increase overall dynamic range
- improve pixel purity
- improve rendered detail
- discard blur from motion when capturing
... and probably more besides. The image processing software (usually the Camera application itself, but sometimes 'helper' processes, as on the Nokia 9, with its 'Image Fusion' process which works in the background for between 10 and 30 seconds per image) does its millions of pixel-level calculations to achieve all of the above and then spits out the required JPG photo. Yes, it's compressed, to save space (the RAW images are huge), but 5MB or so is ample for producing a stunning JPG file, as we've all seen from smartphone camera champions in the past.
For the vast, vast majority of users, having the phone software do all the hard work, backed up by years of work by the relevant imaging engineers, is the way forward. It's fast (well, ok, not on the Nokia 9, or even the 950 XL, which is almost as bad!) and very intelligent. In the Lumia'a case, there's also PureView oversampling going on (in 8MP mode), literally averaging data from pixels in the RAW files around each output pixel and making sure colours are right and that noisy erratic data isn't creeping in. Plus, with HDR-auto in place, there may well be extra exposures to blend in, or flash/no-flash shots in dark conditions - you get the idea. There's a lot going on. In the Nokia 9's case it's got to do extra calculations to merge RAW shots from five separate cameras that are physically separated and thus have parallax perspectives.
So you and I, the user, get a hassle-free 'perfect' JPG photo, at least in theory. Which is why I almost never look down the RAW route here on AAWP, at least - why bother when these files are generally incomplete and of zero interest to the end user?
But then you get a phone like the Nokia 9, which has advocates among the photography enthusiast community. Now, I'm not knocking the latter, but they're not at all interested in the imaging intelligence that's detailed above and which you and I take for granted. These folks tend to see a camera of any kind (whether DLSR or phone) as a source of (literally) raw pixel data that can be lovingly messed around with on the desktop/laptop in an application like Lightroom, with every possible combination of pixel filters and adjustments making for super-arty creations. Now, on the Nokia 9, the JPGs are relatively crude and, as we say, compare badly to PureView champions of the past. Which is why (the new) Nokia positively encourages users to save all photos in RAW format as well and even to edit these files on the phone itself, thanks to Lightroom's availability on Android here. It's just as fiddly and slow as on the desktop, but work can be done on RAW images on the handset, if you feel the need.
Working with RAW
So, what do you get? For the Nokia 9 (and the 950 XL, here), you get a single DNG ('Digital NeGative') file, around 20-30MB in size, typically. Saving these files is usually just a matter of turning on a switch in the Camera application's settings, and then you can snap away, knowing that you get a JPG and a DNG, covering both bases. The sheer space requirements mean that this is all turned off by default, of course - regular phone users fill up their storage readily enough without 30MB RAW files helping them on their way.
So I wanted to give an insight into what a RAW image looks like, how one might start to fiddle with it, and what the caveats are. Do please bear in mind that I'm something of a RAW novice, for the reasons given above, and that the crude brightening (etc) below is only scratching the surface of what's possible. However, I show enough to illustrate some of the limitations of the workflow.
The screen below shows me looking at the Lumia 950's night time effort in the free GIMP on my Mac, it shows some of the import filter tools for RAW/DNG files and a view of the current state of the image:
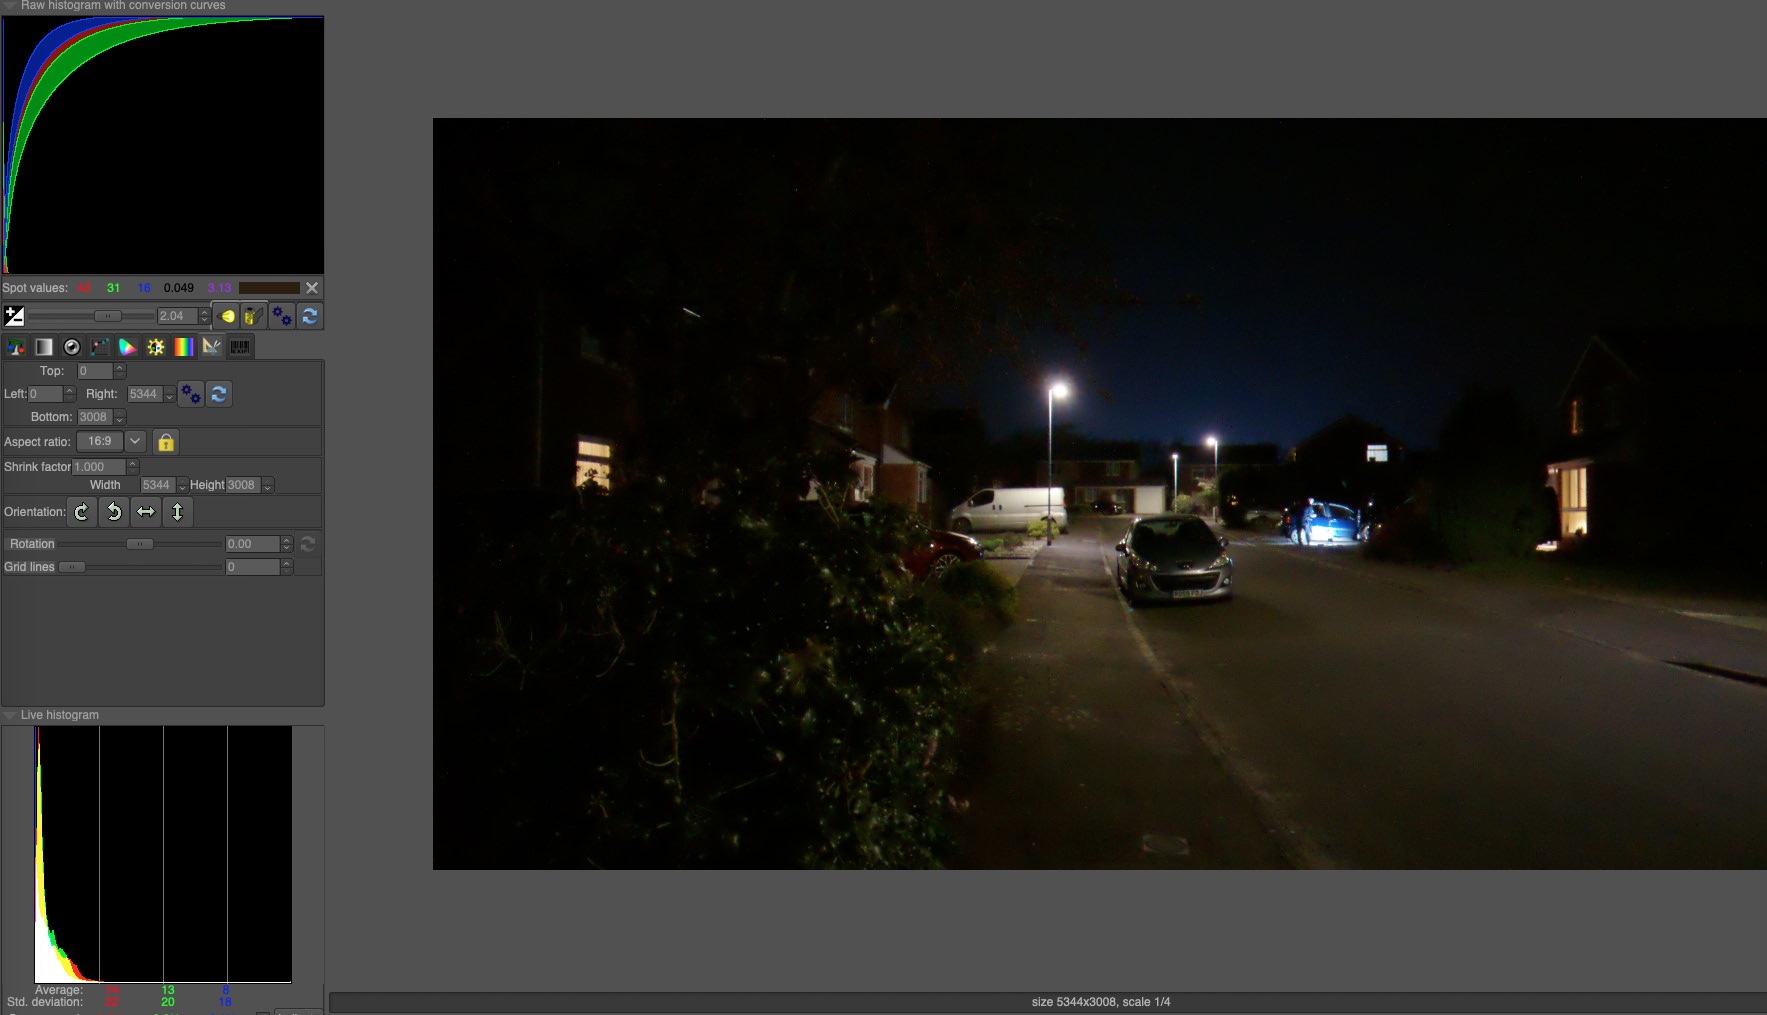
In the Lumia 950's case there wasn't actually much to do - just a little brightening and a little de-noising. The Nokia 9 needed a whole heap more brightness. I don't need to go into detail because the crops below are only illustrative and you can grab the original DNGs for yourself and have a play. GIMP is also available on a Windows PC, and it's free, so knock yourself out.
After a cursory couple of minutes twiddling in GIMP, I had two images for each of two light scenarios: day and night. See below, with my comments.
| Note that the interactive comparator below uses javascript and does need to load each pair of images. Please be patient while this page loads, if you see a pair of images above each other than you've either not waited long enough or your browser isn't capable enough! You ideally need a powerful, large-screened tablet or a proper laptop or desktop. This comparator may not work in some browsers. Sorry about that. On Windows 10 Mobile, use the 'AAWP Universal' UWP app, which handles the comparator very competently (see the tips in the app's help screens). |
Day example
Shooting a typical suburban scene in bright sunlight. Nice and easy. You can grab the unprocessed Nokia 9 original DNG and Lumia 950 original DNG on my own server, for your own analysis in the RAW editing system of your choice.
To look at the RAW images in more detail here, after my light processing to make them useable, here are fairly central 1:1 crops, just wait to make sure the page has fully loaded and then use your mouse or trackpad pointer to compare the images:
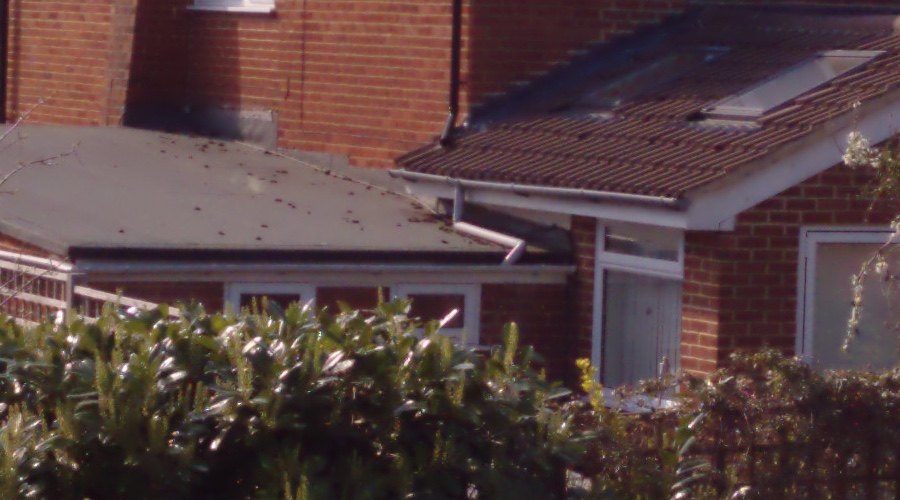
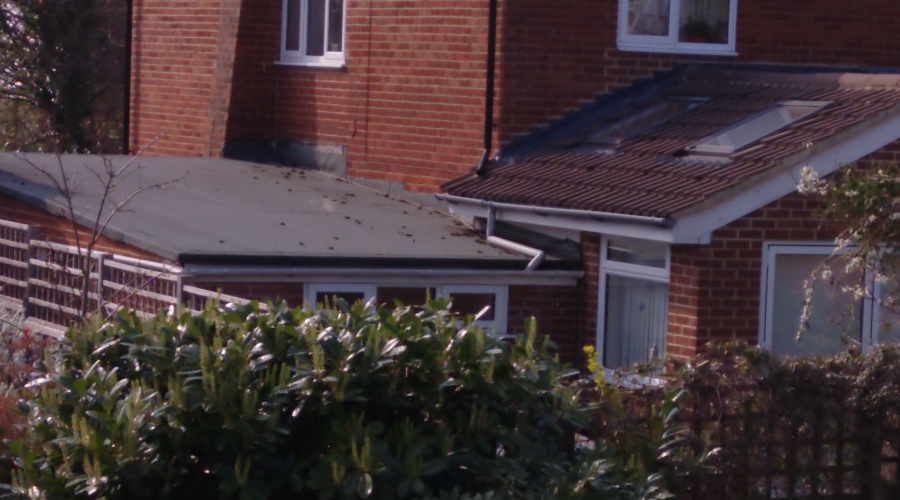
My first thought (and yours too?) is how 'unsharp' these are. That's beause these images are effectively as they come off the sensor (after all the Bayer stuff, and presumably the Nokia 9's DNG has an extra camera combination processing 'pass'). So there's none of the typical sharpening that's part of the bullet list of image processing work above. Which is as expected, the point about working with RAW files is that you're expected to do all the post-processing yourself, according to your own tastes. So you could, for example, opt to not sharpen at all, to reduce noise, and to go easy on the colour enhancement for an ultra natural effect. It's up to you.
Secondly, notice that the images aren't that different, here in good light. You could, in fact, take a RAW file from almost any phone camera of similar resolution in sunlight and it would look much the same - this is simply a really easy shot to take.
Thirdly, the framing's slightly different, of course - the difference between cropping into a 20MP RAW file and a 12MP one. Don't let that bother you, even though, ultimately, the high resolutionof the Lumia will win out in terms of pixels to work with.
Night example
Crunch time is, of course, in low light. This is where large sensors, large apertures, and - most importantly - OIS shine. This is the night suburban road scene from my GIMP screenshot above. You can grab the unprocessed Nokia 9 original DNG and Lumia 950 original DNG on my own server, for your own analysis in the RAW editing system of your choice.
To look at the RAW images in more detail here, after my light processing to make them useable, here are fairly central 1:1 crops, just wait to make sure the page has fully loaded and then use your mouse or trackpad pointer to compare the images:
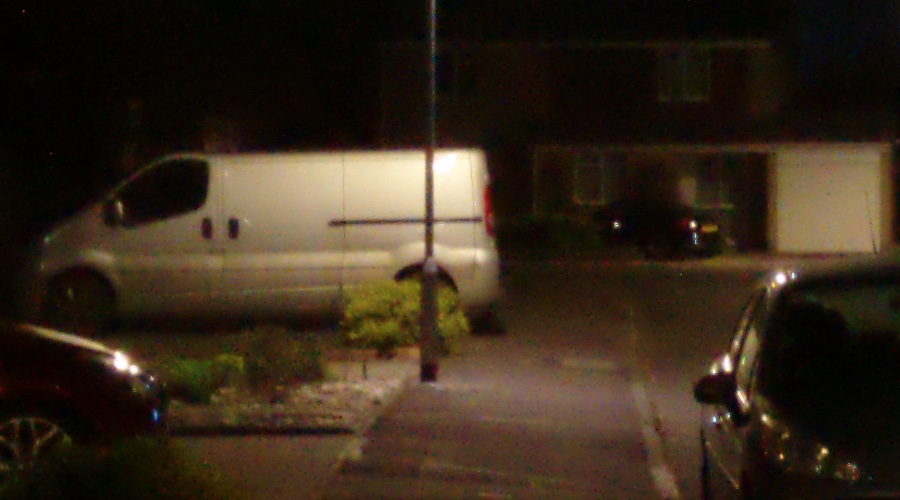
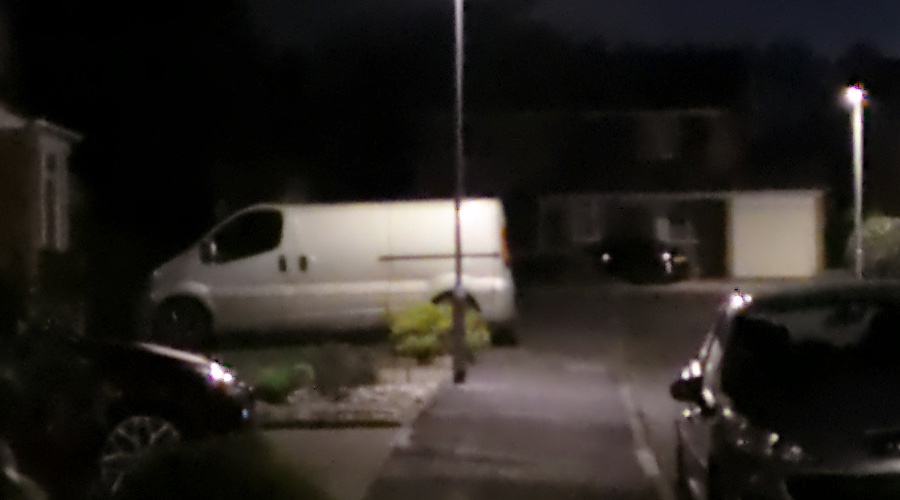
The first thing to note is how rubbish the Lumia 950 XL RAW image is - we're so used to seeing oversampling and various other image processing wizardry tidying up the data from the sensor that the sight of raw pixels is a shock. Just look at the patterns of colour variation throughout the DNG file. It's regular and it's almost certainly the sort of thing that the intelligent algorithms that crunch away and deliver a JPG would sort out. Colour variations away, the OIS has done a decent job though, there's no blurriness from a handheld shot at night.
The Nokia 9 RAW file has very different characteristics. Both good and bad. The good is that the colours are very natural and very even, possibly because the DNG wraps up all the colour data from five separate sensors. The bad is that there's motion blur from the handheld shot at 1/30s. It doesn't look too bad when you view the shot as a whole, but look at pixel level here and you can clearly see that things aren't quite as crisp as they should be. If I were Nokia, I would have definitely included OIS on at least one of its five lenses, it would help enormously on low light shots.
The latter, Nokia 9 owners will declare, can be fixed by clamping the phone on a tripod - and they're right. I imagine that a fully stable shot with all five cameras putting in data would be excellent at night. And maybe carrying around a tripod goes with a fondness for fiddling with RAW files after the fact? I just know that this isn't me! I took the shot above and it looked fine on the Nokia 9 screen. A few days later and I'm looking through test shots are realise that there was hand shake, a good example of what can go wrong when a phone camera is unstabilised.
_________
You'll have noted above that I emboldened the section on the work that a Camera application does to take RAW data and produce a JPG image that it thinks will please the user - you or I. This is because I can't emphasise enough that 99% of the time we should trust the imaging software in our phones. This includes taking shots on full 'auto', it includes fiddling in a 'Pro' mode to adjust shutter speed, ISO or exposure, it most definitely does not include side stepping all the intelligence and trying to achieve better results with a single large pixel-dump and lots of creative tweaking later on.
Comments welcome then. Are you part of the 99% who want the phone's native imaging intelligence in JPG construction, or are you one of the DNG tweakers whose sanity I'm doubting?
