Review: 4Blend HDR
Score:
74%
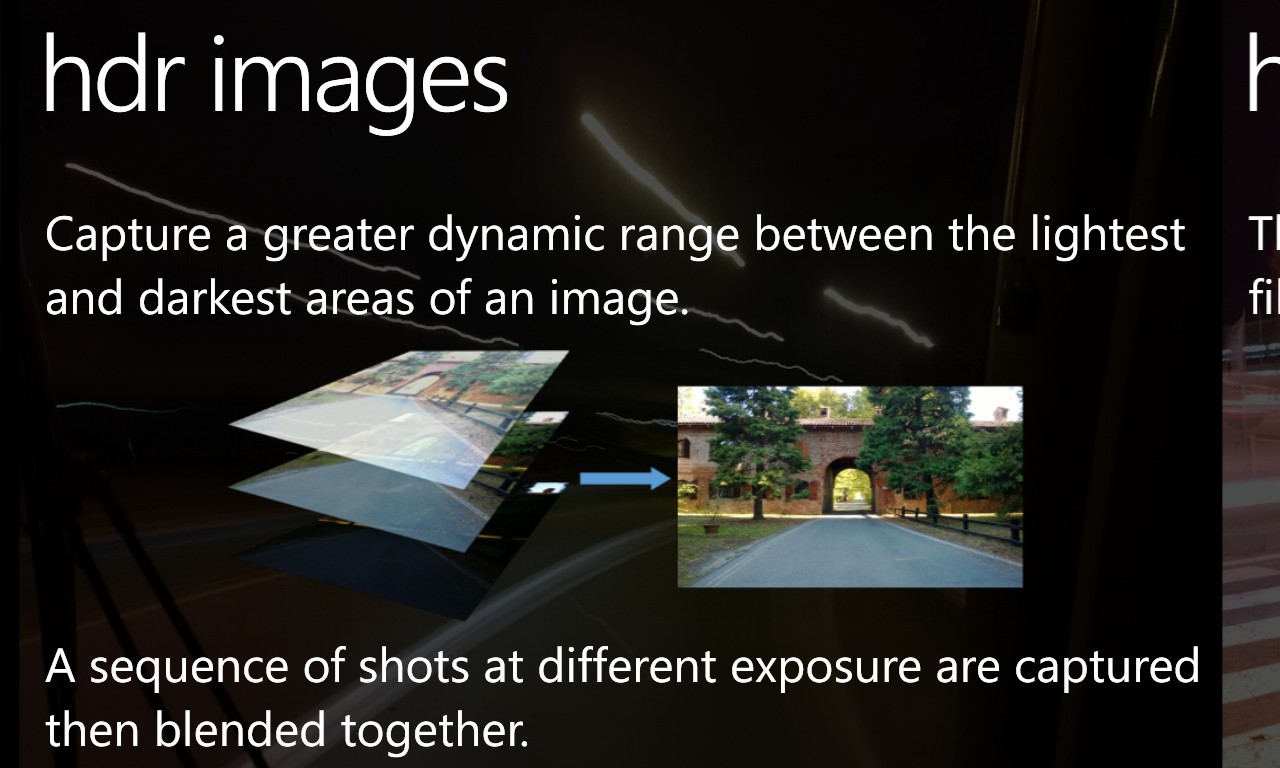
Capturing good HDR (High Dynamic Range) photos on Windows Phone has never been simple, with some of the best requiring lots of processing time and extreme effort to get anything useful. 4Blend HDR is a new, free application that leverages Nokia's new Imaging SDK to produce HDR that's quicker to use and generally more effective and flexible. Yes, it still helps enormously to have a tripod or a wall to rest the camera phone on, but I was much happier in 4Blend than any previous HDR offering in the Windows Phone world.
Buy Link | Download / Information Link
The problem with software-based HDR (as here, as opposed to hardware-accelerated HDR, as in the iPhone) is that there's a distinct time gap between exposures - so the slightest movement in the subject or (more likely) the user's hand and the bracketed HDR exposures don't line up properly. Some HDR apps attempt to align the shots, but this is a) time consuming and b) almost never works. 4Blend HDR doesn't attempt any alignment, which is partly why the HDR rendering only takes a couple of seconds. Which in turn means that you can snap a lot more HDR shots.
As usual, it helps enormously to keep the camera phone completely still - a tripod is best but few people carry these around - for the test shots below I shot handheld but always braced against a wall or post - which helps enormously.
Being based on Nokia's Imaging SDK, a lot of the interface is instantly familiar, from the intro tutorial screens:
...to the main UI, with drop down circular, thumb-friendly controls for every parameter (though you can't spring out all of them at once, as you can in Nokia Camera, because of the extra complexity of having settings for each bracketed shot):

Down the left is a vertical carousel of effects and the usual candidates are there, but I'm going to focus almost exclusively on the unique selling point here - the HDR capabilities. Interestingly, HDR can be combined with one or more effects/filters, though of course this is a capture-time thing - if you really want zany effects then you're much better off taking the shot 'pure' and experimenting with effects later on.
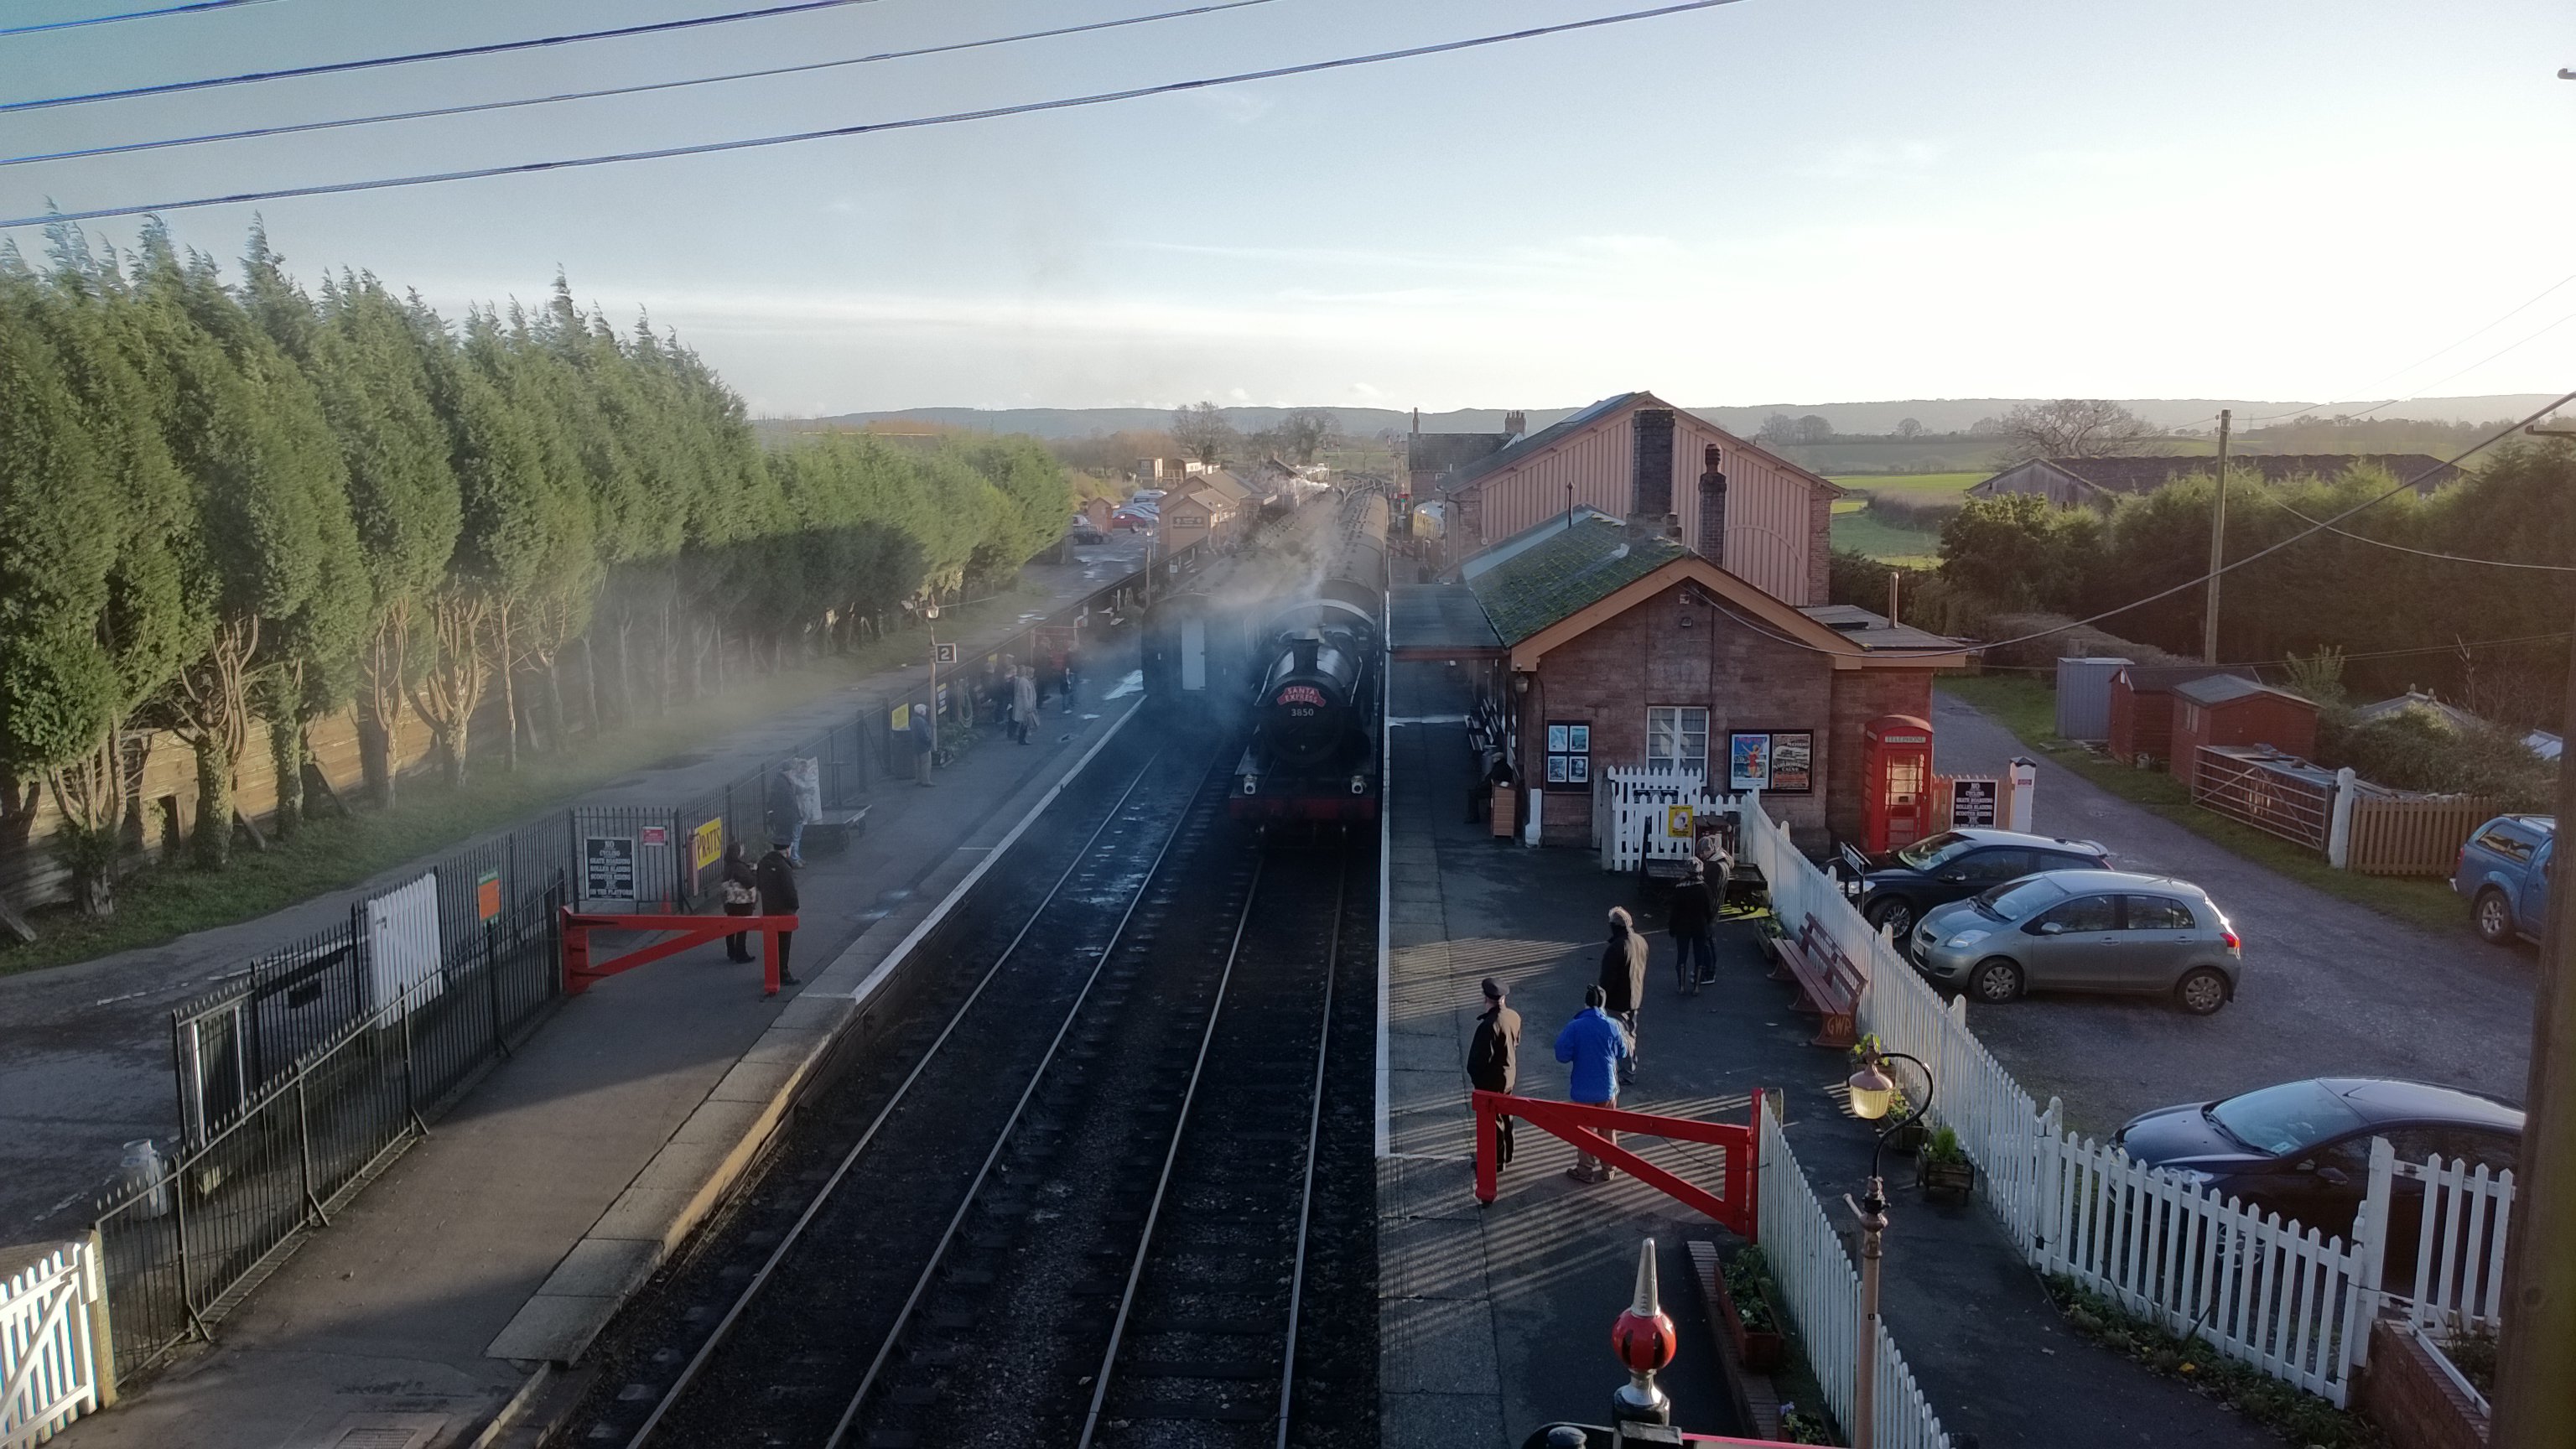
I headed out with 4Blend HDR to the local steam station (what else?!) - where the outgoing train was all in shade - a nightmare to photograph on a sunny winter's day, but maybe HDR could help here? Here's a shot with just 'HDR' active, from halfway up the bridge steps. This photo then, is a HDR composition from three default-bracketed exposures within the application. Click on the photo on the page to enlarge it in your browser or download it for offline study, up-close:
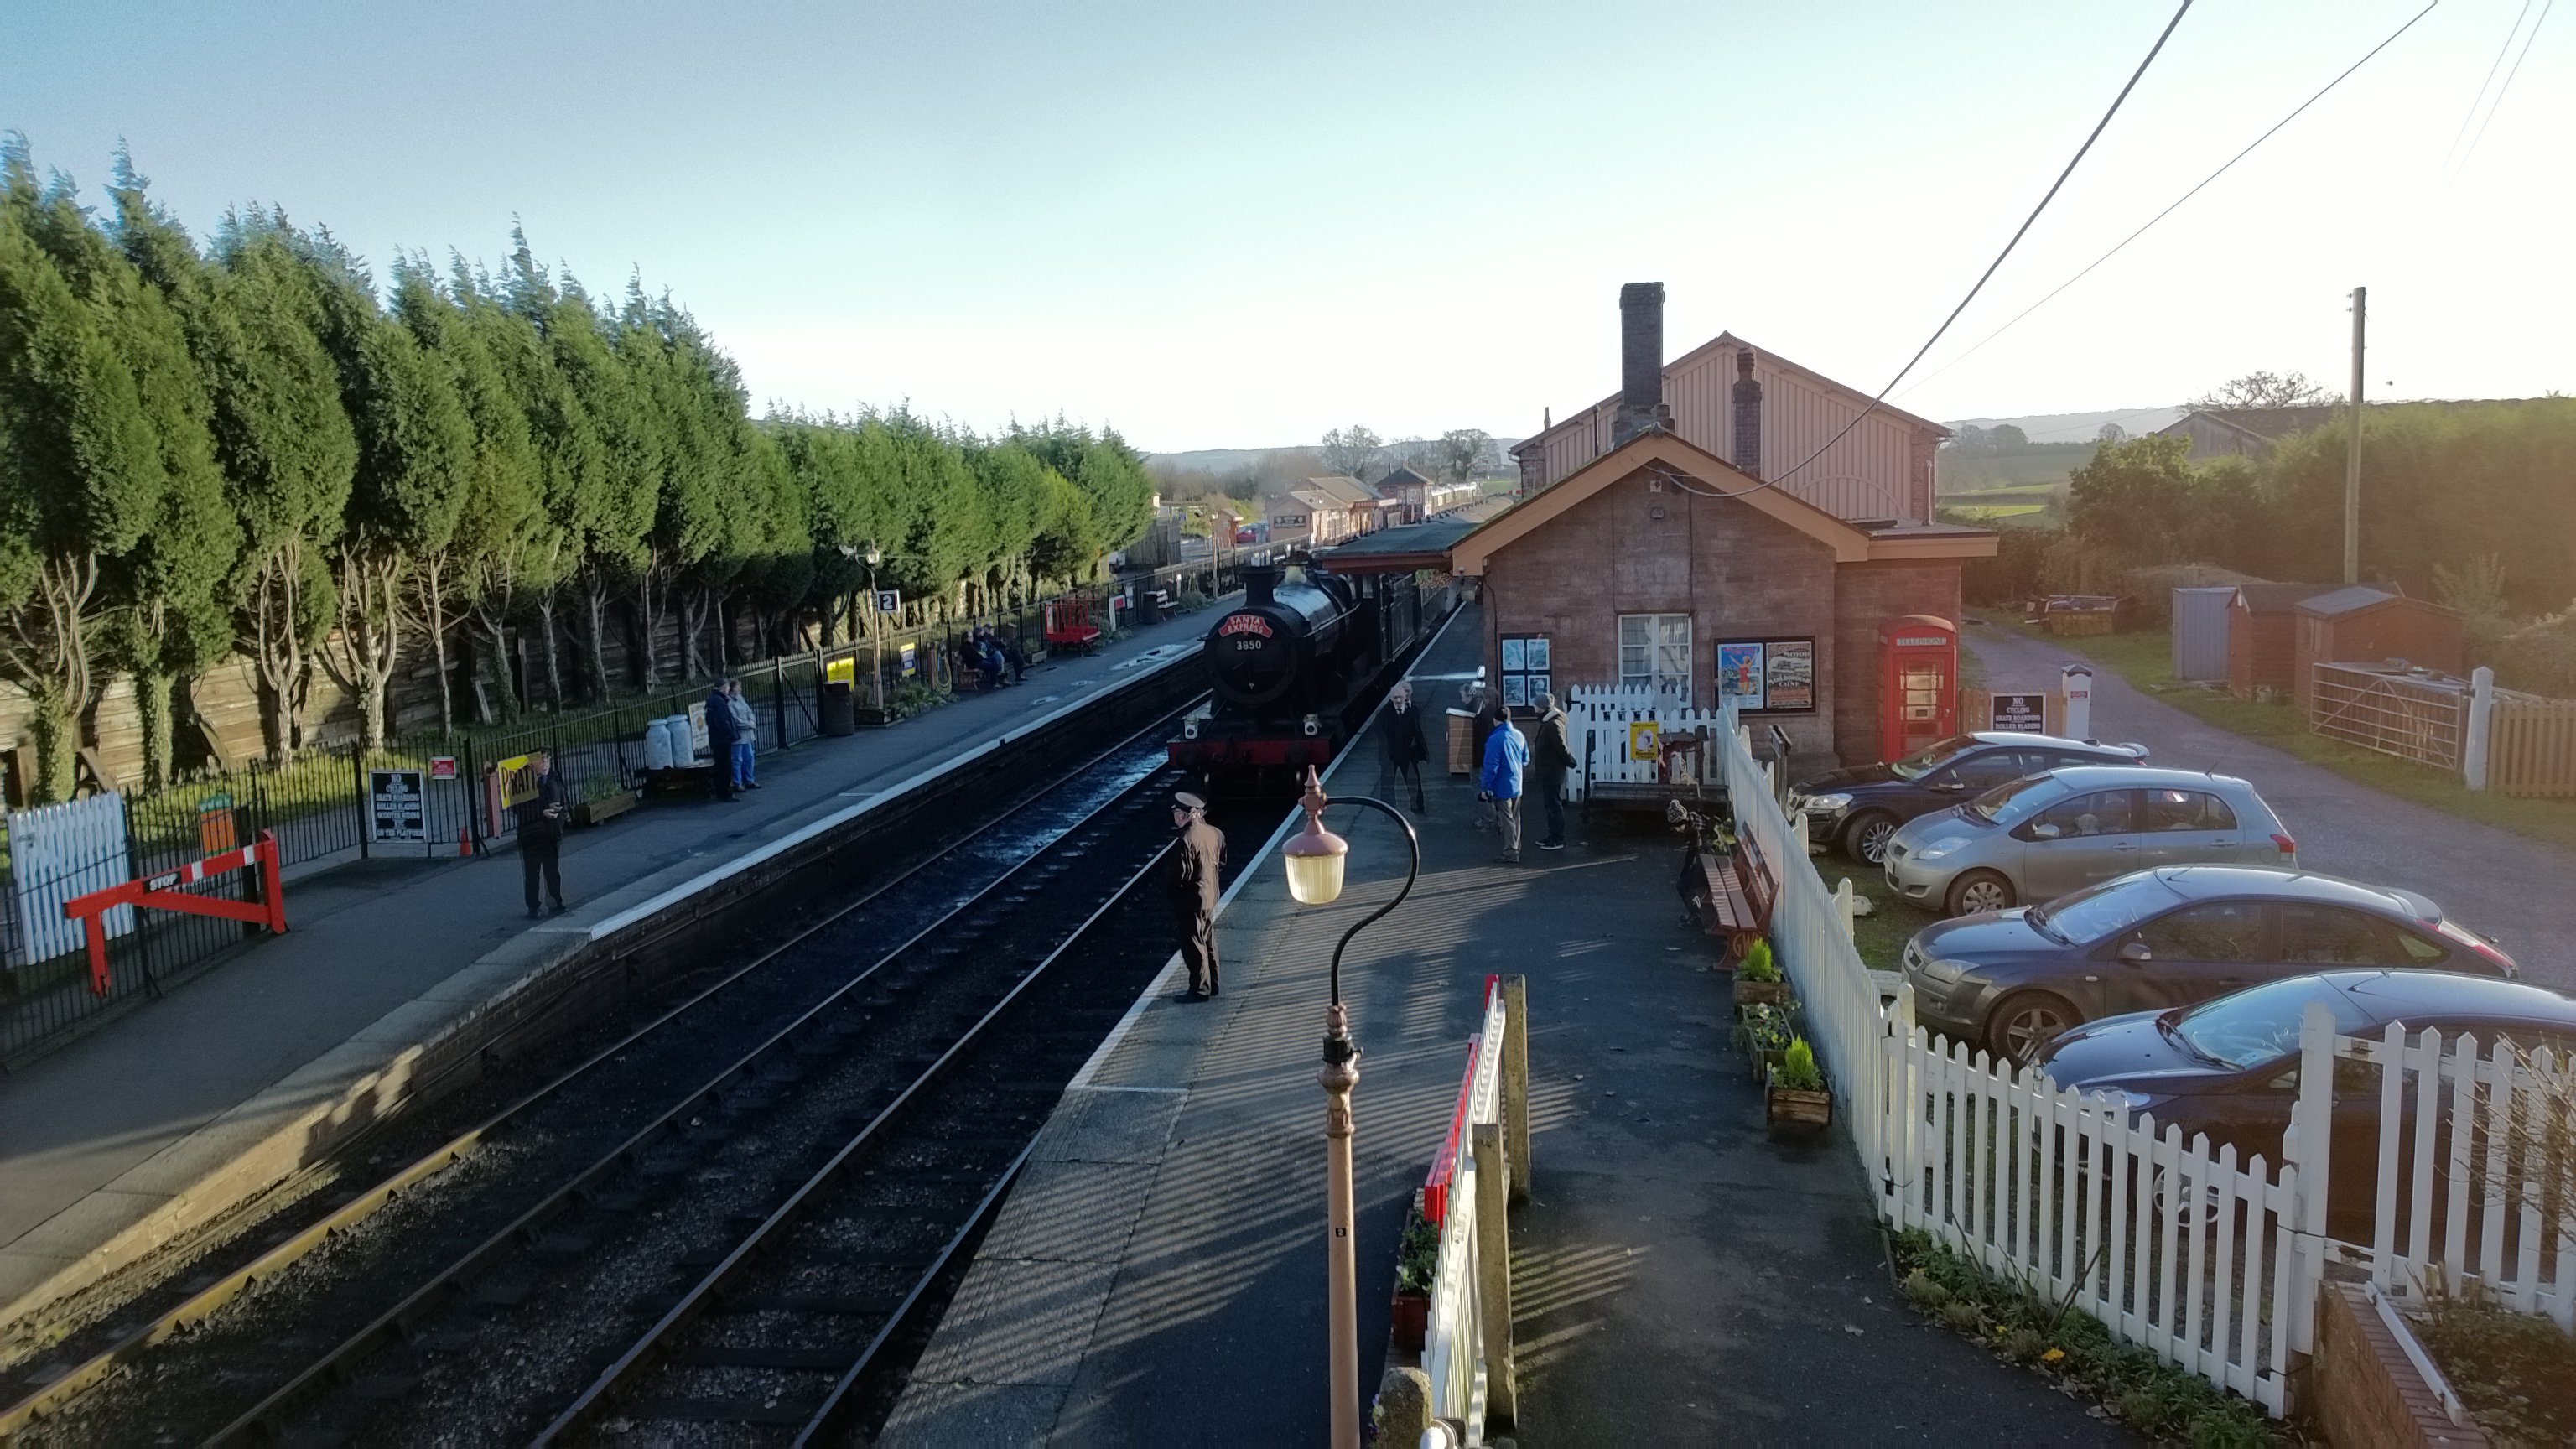
Considering how much the train was in shadow and the challenges of shooting almost into the sun, this came out pretty well. 'Colour Boost' is just below 'HDR' and can be set active at the same time. The idea, presumably, is super-saturation of any colour elements. Here's the HDR/Colour-boosted shot:
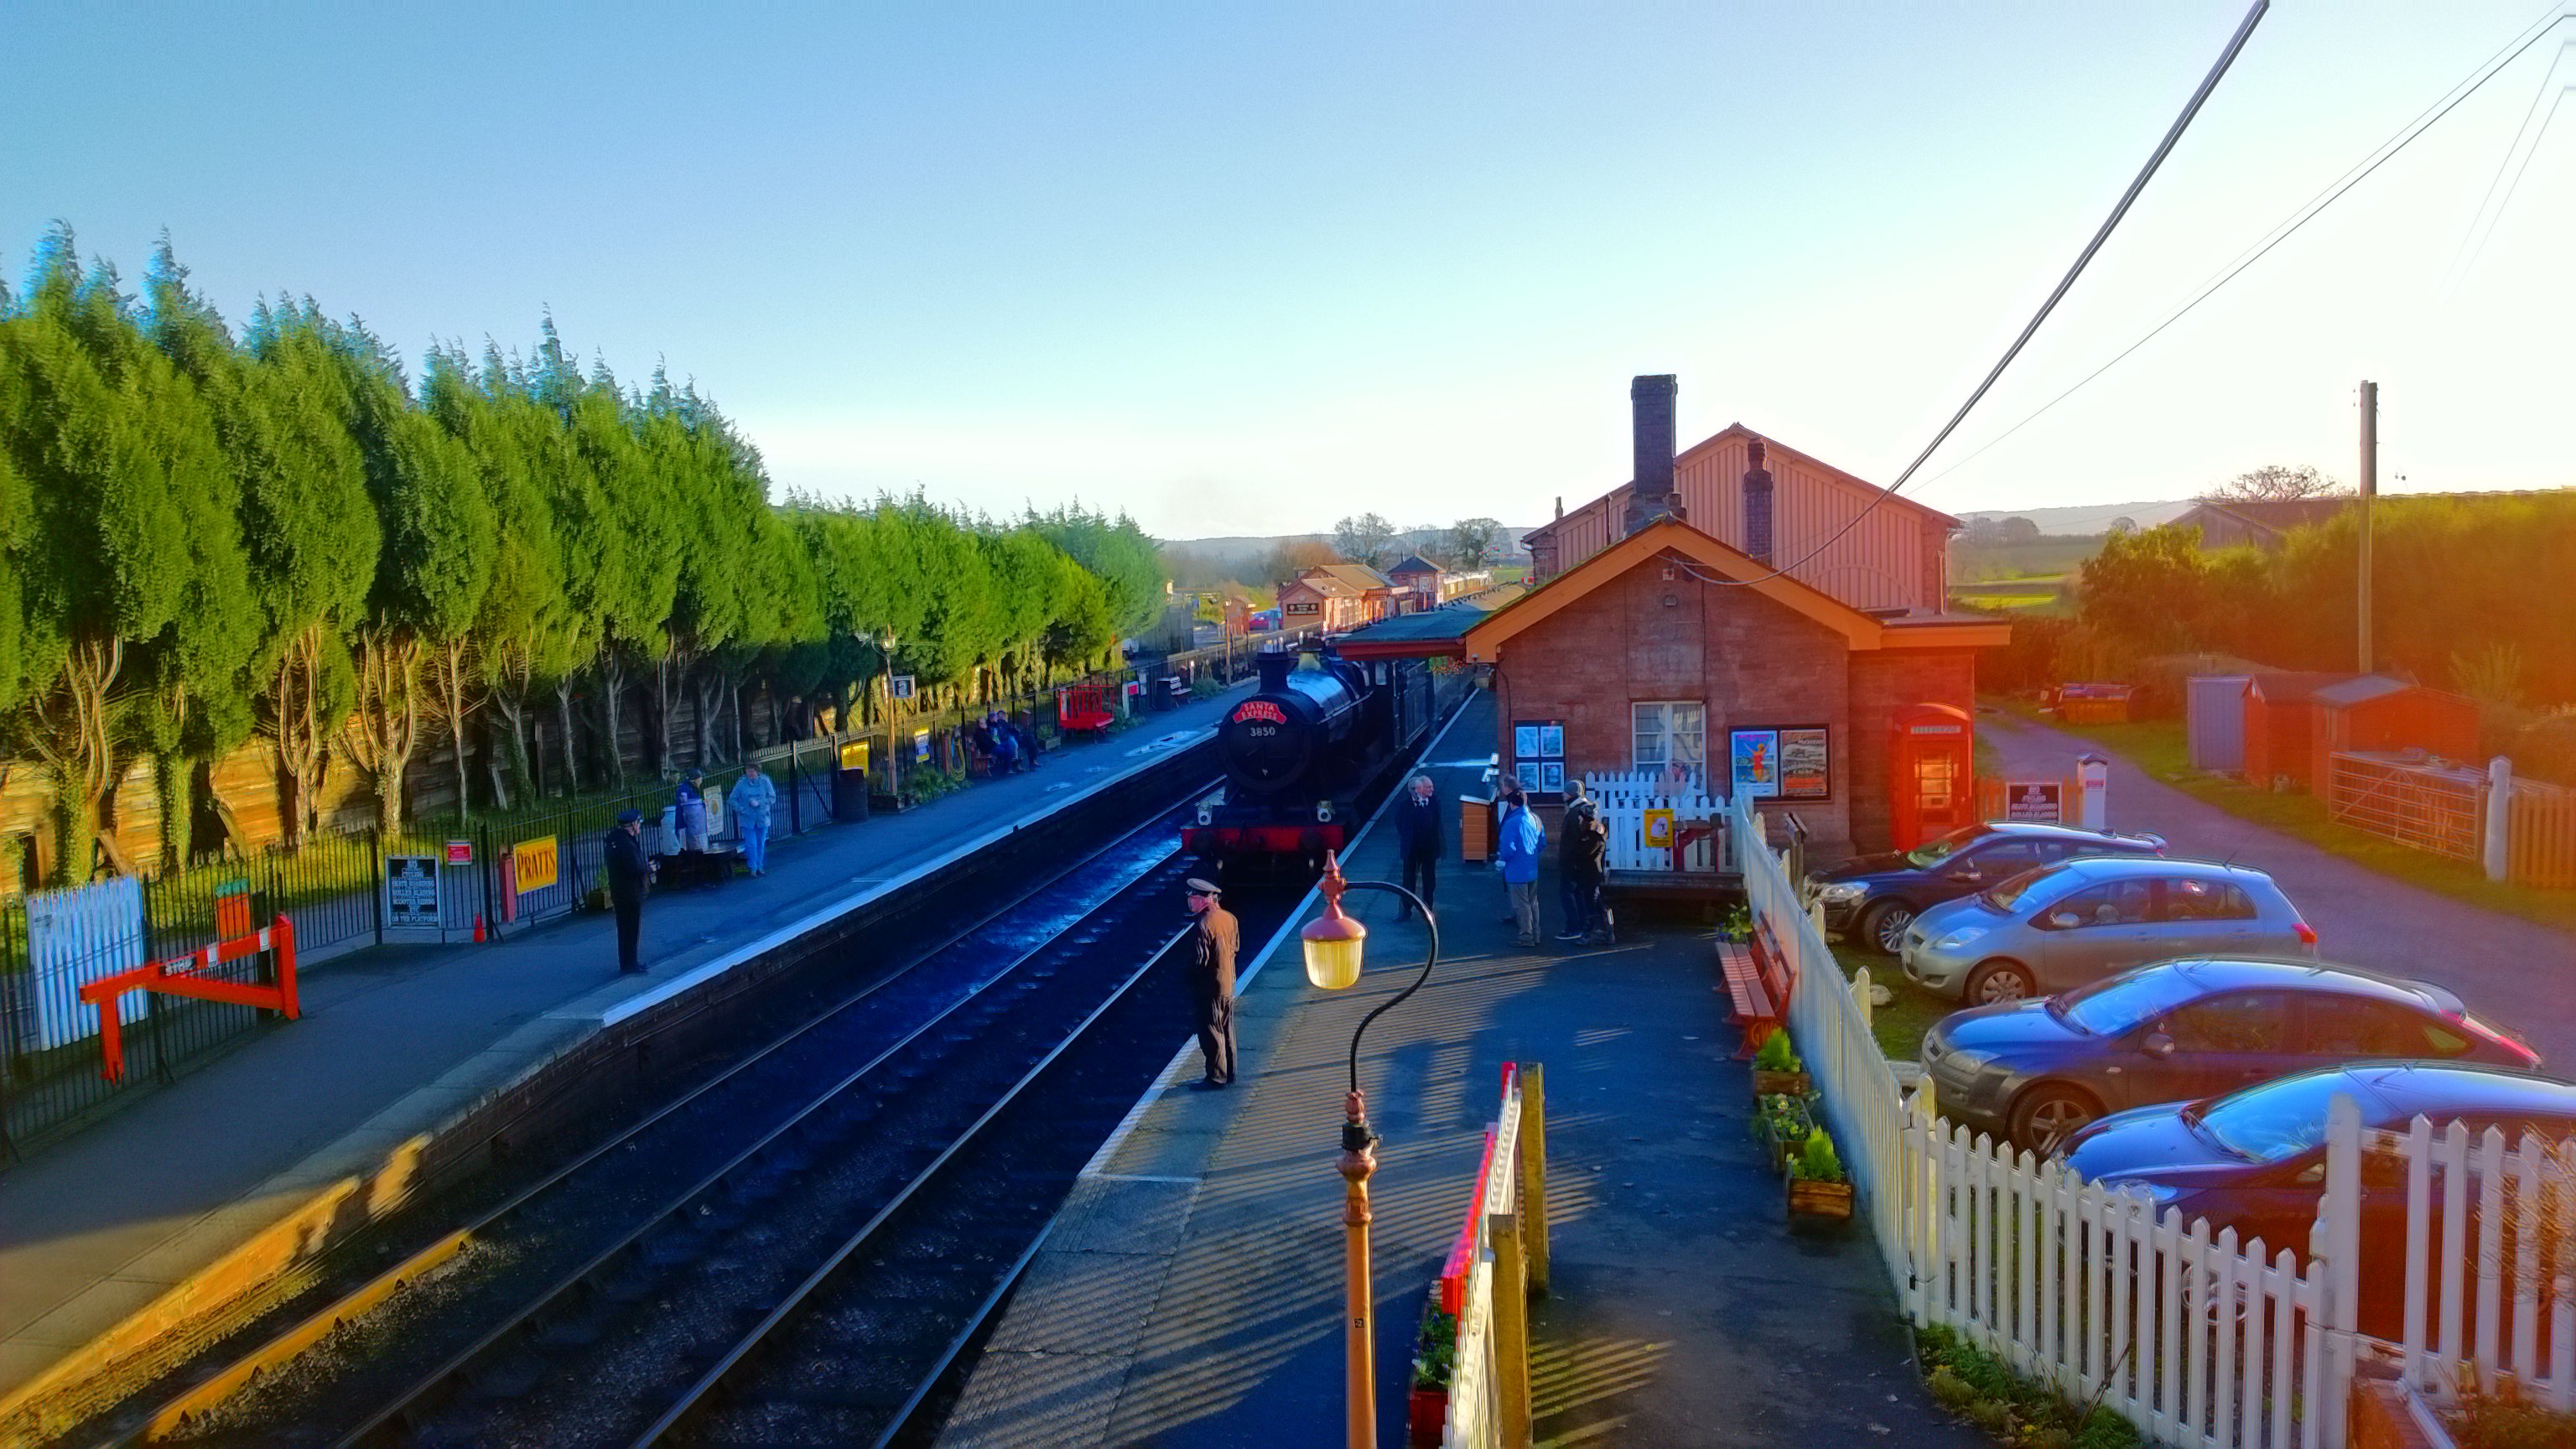
Rather attractive but obviously oh-so-artificial. I should emphasise that these test shots were all with default camera paremeters - it's possible to dial back some of the HDR effects by fiddling, but that's a tutorial for another day.
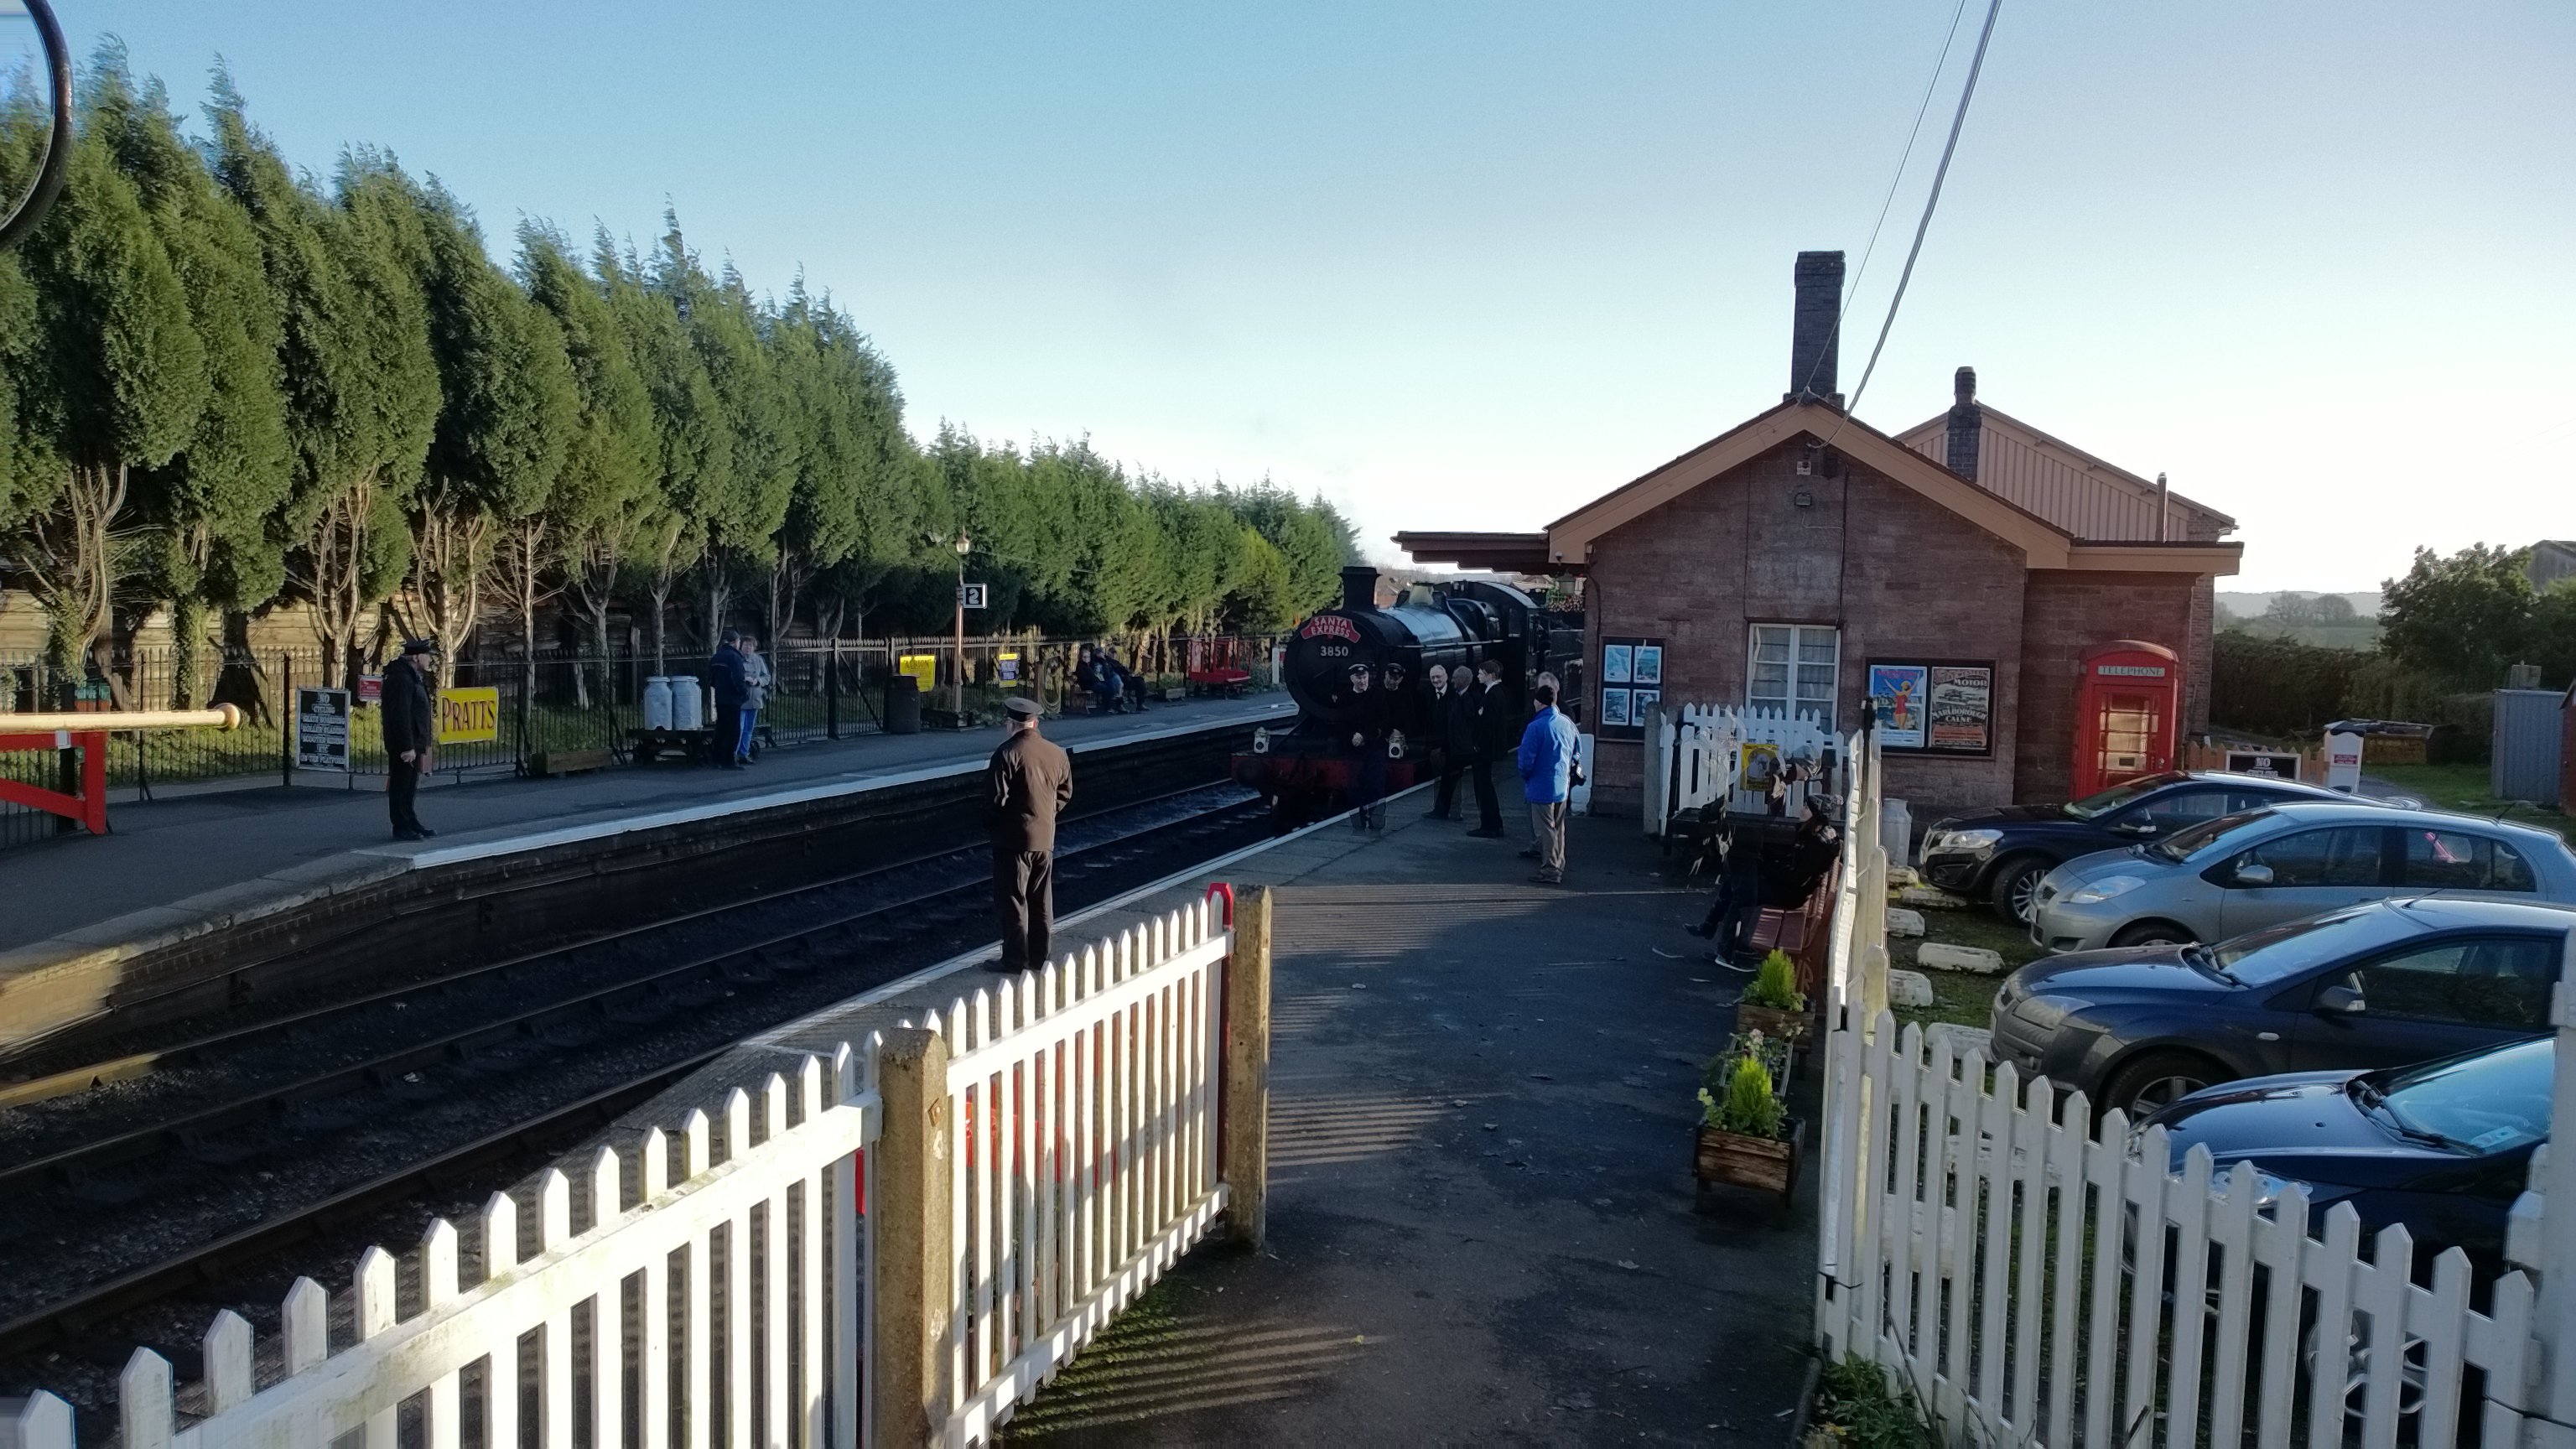
Back almost at ground level, I tried again, resting the Lumia 1020 being used for this review on a convenient post. I should emphasise that the 1020 and other Nokia top-end Lumias do have OIS, but this is designed to cope with wobbles during a fraction of a second - HDR takes at least a couple of seconds on this device, so some sort of extra physical support is needed. Again, click the image to enlarge or download:
Let's check how consistent my framing was - cropping into the HDR result gives this:
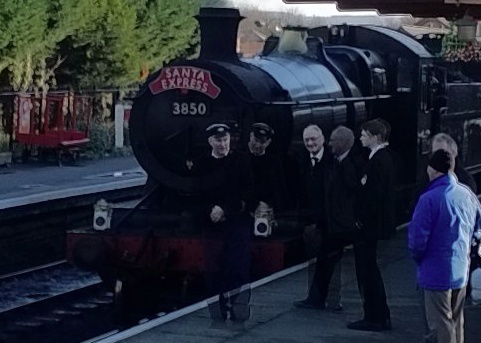
Aside from the duplicated people (who moved between the bracketed shots), the train itself is admirably crisp, even though its pixels are composited from three separate photos. I'll take part of the credit for the stability, the Lumia 1020's OIS can take a little more....
Making things even more cinematic, here's the HDR view from the bridge, against shooting very slightly into the sun, so again a nightmare shot to get without HDR - or at least without savagely over-exposing the sky and other brightly lit elements:
I couldn't resist popping on the 'Colour Boost' filter again. As usual, click to download or enlarge:
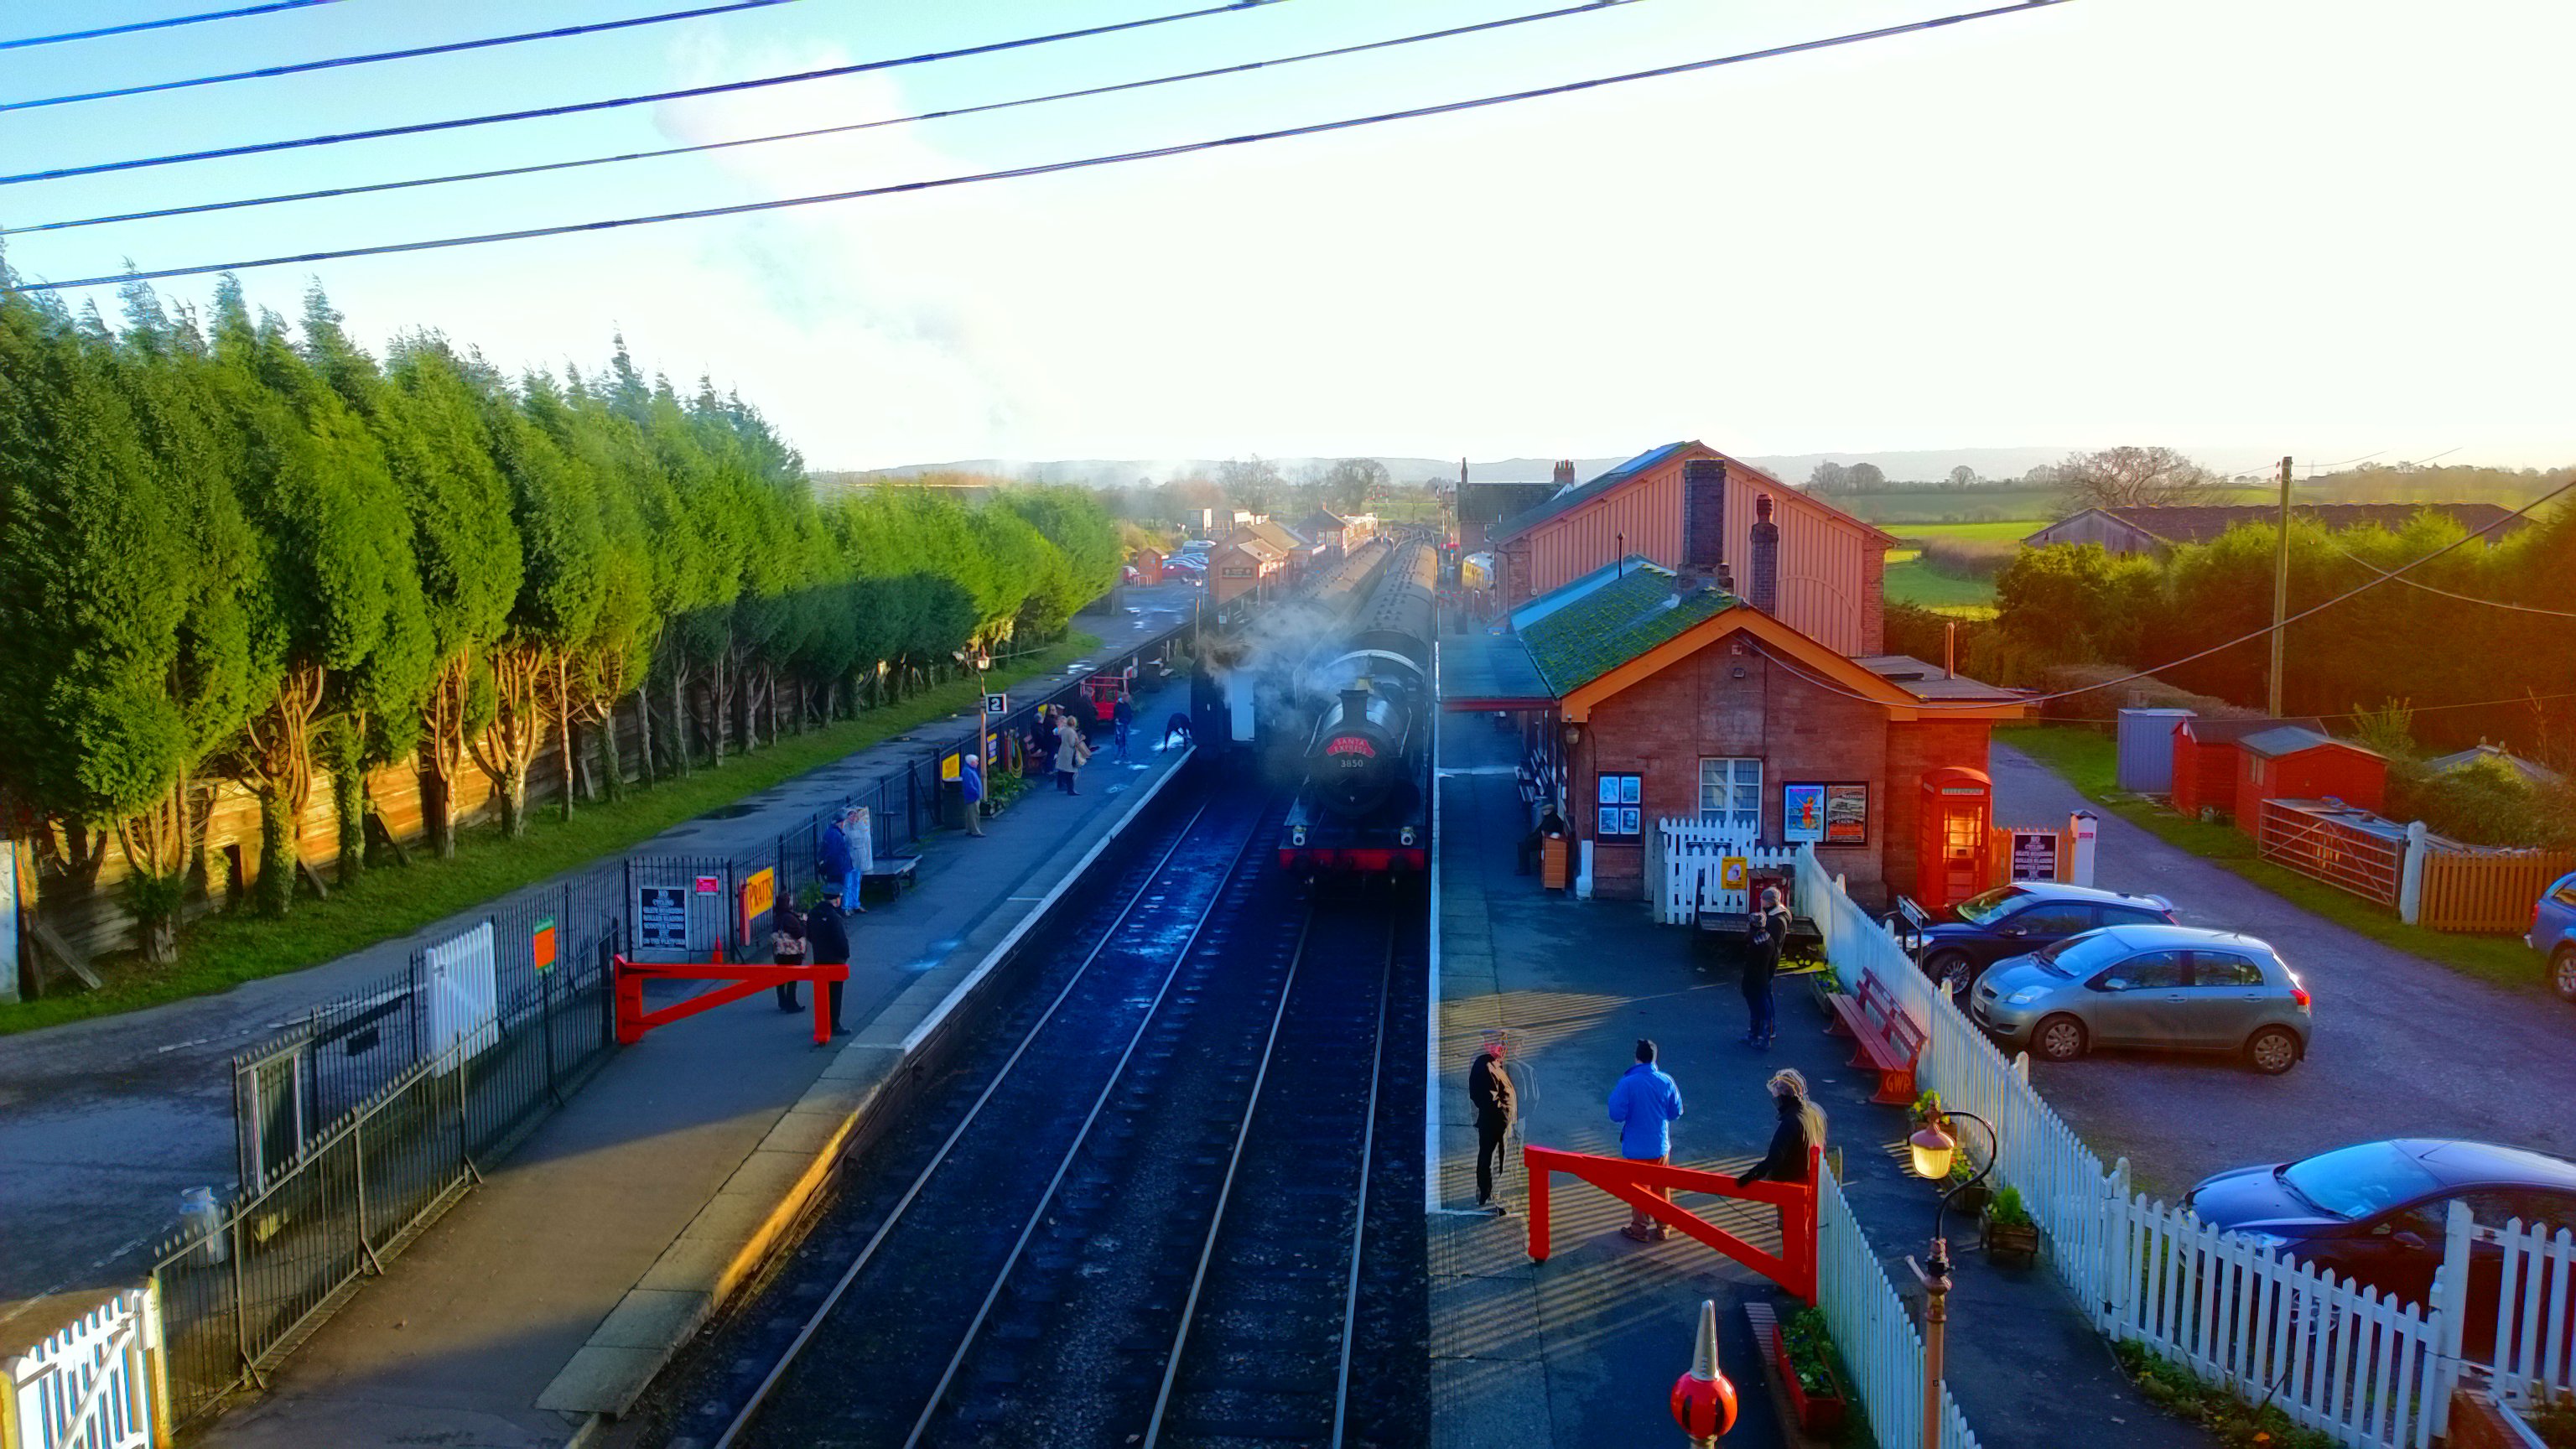
Terrifically pretty, it's a steam station in summer and everything's jolly and happy. But a million miles from capturing the scene accurately again. I suspect that 'Colour boost' would do better on flowers and nature generally.
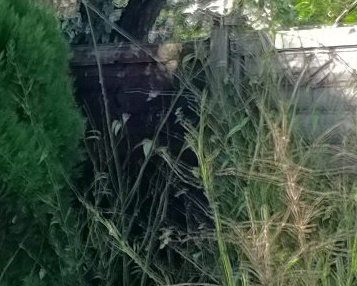
However, the shots above were taken with me being careful - and I know what I'm doing in terms of not jerking a camera phone. What about if I had nothing to brace the phone on? i.e. totally handheld? Here's a corner of our garden (rather bare in mid-winter!!), shot against a bright sky:
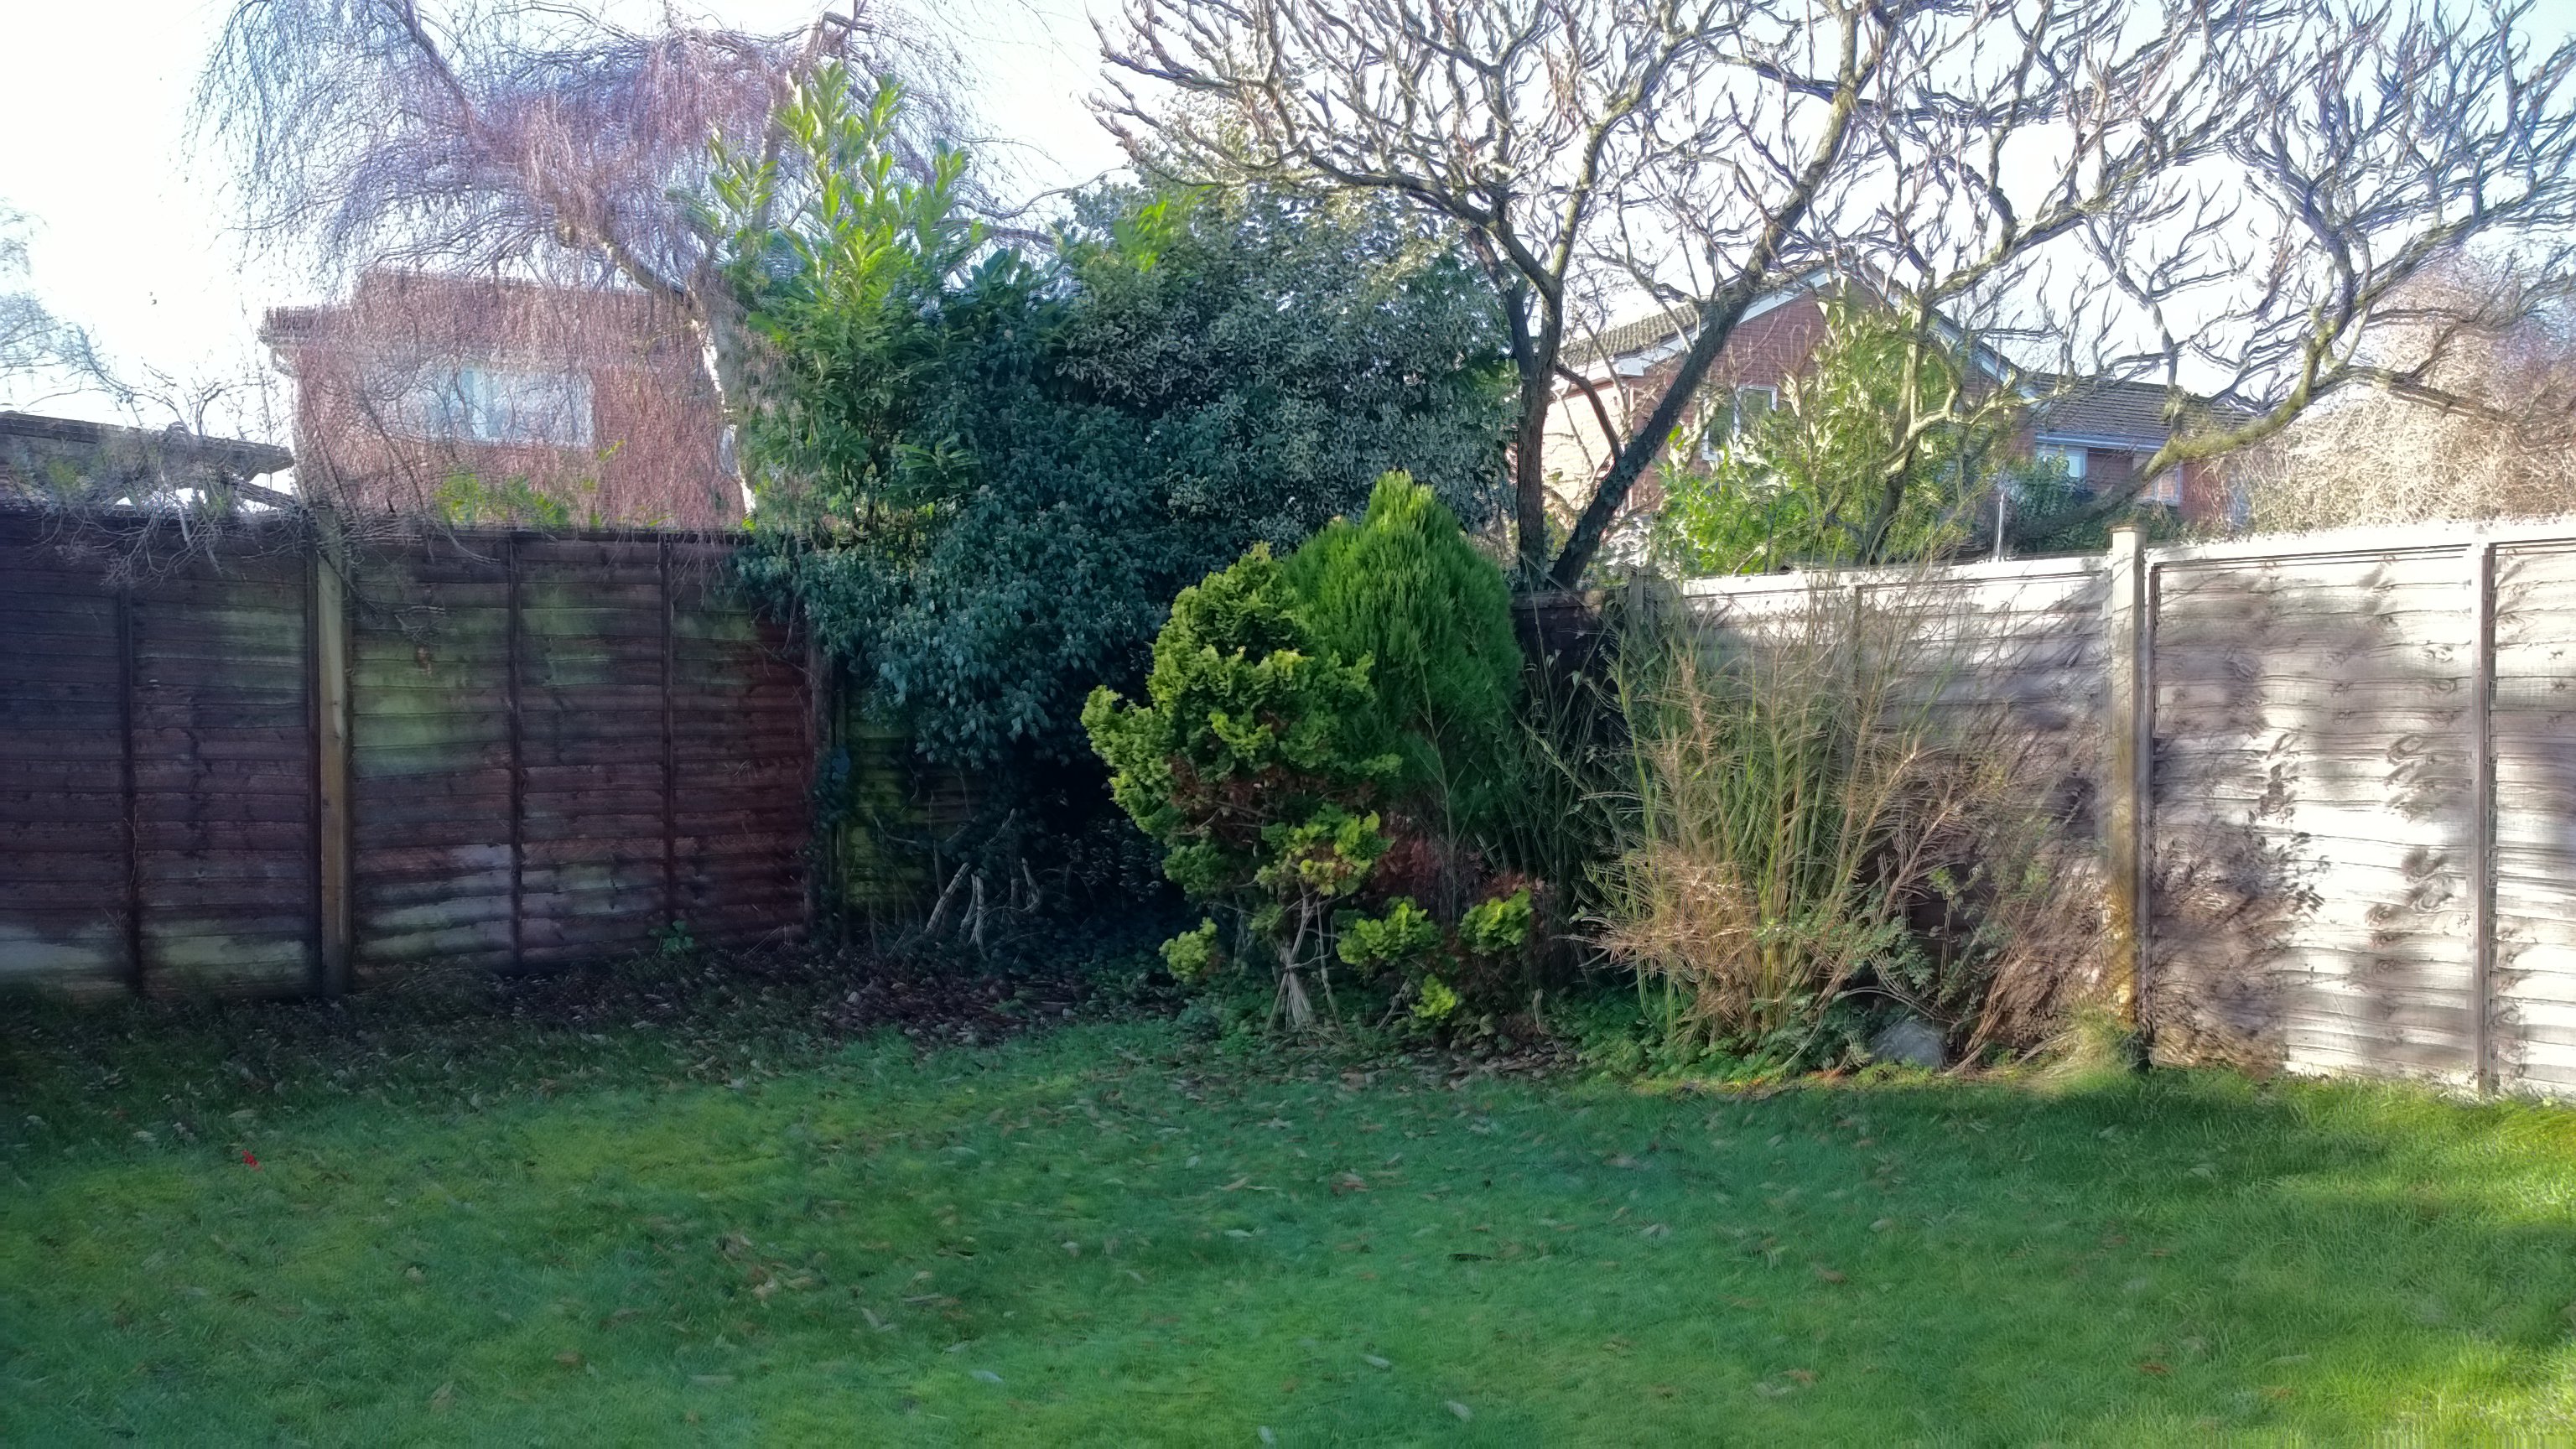
The HDR shot above doesn't really do much more than the 'normal' shot, though I suspect that manually tweaking the 'over-exposure' bracket could bring the sky under control better. However, what I was interested in here was what happened in detail when the camera phone wasn't tripod-mounted or braced. Let's look at a 1:1 crop from near the centre of the HDR photo:
Look carefully and you can see ghosting, everything's doubled up, the result of 4Blend taking the three bracketed shots as-is and not attempting any alignment. Note that I'm not apportioning blame here, attempting auto-alignment of 5 megapixel photos, even with today's fast phone processors, is almost impossible to get right - I'd much rather the shots be composited as they are and put the onus on the user to keep the camera phone braced or suitably mounted if they want really detailed HDR shots.
Handheld HDR will be OK for social VGA-res Twitter and Facebook shots, since small ghosting will be downsampled out, but anything more will require as much care as I took above.
Of special note in 4Blend is that you can opt, in the Settings, to keep all the original bracketed shots - these end up with filenames suffixed with 'OE, NE and SE' (over, normal, sub exposures) and this is a good way to play with 4Blend's effects and HDR while knowing that you can still work on the bracketed shots back on a desktop later on. The downside is that it rather clogs up your Photos gallery on the phone, but at least you've got the choice here.
The drop-down circular controls work very well, just as on Nokia Camera, and I suspect we'll be seeing more and more of these in future camera-related applications in 2014. The skill in HDR photography is knowing how far to 'push' the over and under exposures for best composition results, and 4Blend will accommodate whatever preferences you have here. You can even use dramatically different ISO, shutter speeds and even focus(!) for each bracketed shot, for err.... special effects!
There's a slightly gimmicky 'voice command' feature, the idea being that you speak a predetermined word in order to initiate capture on a tripod without having to touch the phone. In practice, I couldn't get this to work at all and would much rather have had a built-in self-timer, the traditional way of starting a capture sequence without inadvertently nudging the phone.
There's also no EXIF data in the HDR photos - the JPGs are 'bare', which is a shame - no doubt this is something easily fixed by the developer - surely there must be some kind of consensus or standard for HDR EXIF data?
However, I shouldn't be too churlish here, there's plenty to like in 4Blend HDR, it's the fastest and simplest way to do HDR on Windows Phone and is free too, so there's no reason why everyone shouldn't give it a whirl.
Reviewed by Steve Litchfield at