My series 'Anatomy of a Lumia photo' (here's #1) has proved popular, even though I cheated with the HP Elite x3 instead for #2. #3 had a lovely clock, #4 was all about framing, in #5, I got down and dirty with nature, in #6 I had a rosy dilemma to solve, and in #7 I took a satisfying low light snap in appalling weather. In #8, I got extremely close to an impressive moth, in #9 Andrew Elliott was in Budapest at night, in #10, I was shooting in early morning sun, in #11, I shot 'wide', with a little help from Panorama mode, in #12 I kept repositioning and zooming until I got a water fountain just right and in #13, Jeff Appleton got a good look at The Northern Lights. Then, rounding off the series for its previous run (in 2017) was #14, looking at a glowing tower. Resuming in 2019, here's #15, looking at framing a waterfall and pond, #16, steaming to the seaside with angles and perspectives, #17, 'Remembrance', creatively shooting a Remembrance Day display at night, in #18 I returned to the graveyard featured in #18, but this time with oodles of December fog to add atmosphere, and finally in #19 I went walking in a Bluebell wood.
The device used here was again the iPhone 12 Pro Max, but in fact most decent smartphones with 'ultra-wide' cameras could get close.
Here's my final main shot, anyway, you can also find the full resolution (HEIC format) photo on OneDrive:
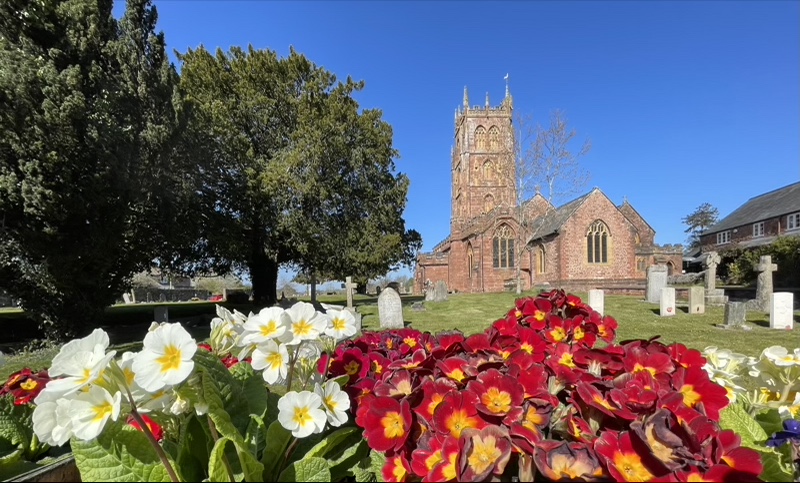
So - loads of colour, loads of detail, and a very satisfying scene, it's almost like you're 'there', with little clue that camera optics are changing the outcome.
The set-up in the village is that there are rows of raised beds with flowers along the front of the graveyard, by the pavement. Then there's a lot of grass and graves to the church building around 50m back. The question is what to do about the different in subject distances. I.e. without getting run over and stepping back into the road, how can I possibly photograph both flowers and background in the one snap?
Traditionally, of course, I couldn't - the optics in any normal camera lens would mean either focussing on the flowers, like this:
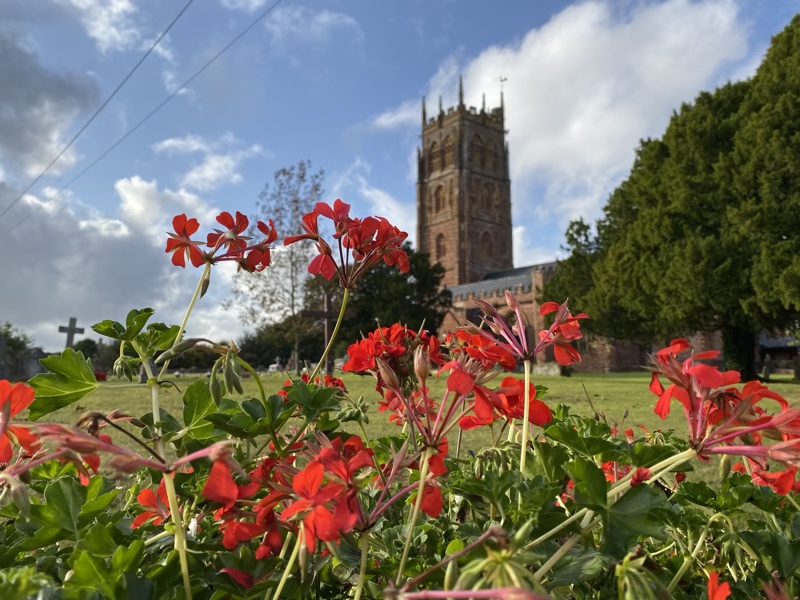
...with the church being artily blurred in the background. A popular effect, to be sure. Or I could focus on the church and leave the flowers blurred in the foreground, which would just look wrong.
It's all about Depth of Field (DoF) here, and physics means that what I want is impossible.
Or is it? When there's enough light, one wacky idea is to deliberately shoot with the ultra-wide lens, if your phone has such (most do, these days). With a smaller sensor and much smaller aperture, this camera typically has much larger DoF. Usually a 'bad' thing from an artistic point of view, but not in this case.
Here's the physics - when aperture is larger (top), more of the curved optics (here simplified into a single lens for explanatory purposes) are available, and there's no way that the same optical focussing power can converge light rays from two such different distances (the diagram shows focus on the flower).

When the aperture is smaller (bottom), less light can get in (partly why low light ultra-wide angle shots are poor in most cases) but what does make its way from the two subject distances doesn't get 'bent' (refracted) much in creating the digital image on the sensor, so both can be acceptably 'in focus':
I took aim with the (in this case iPhone's) ultra-wide camera and took the shot:
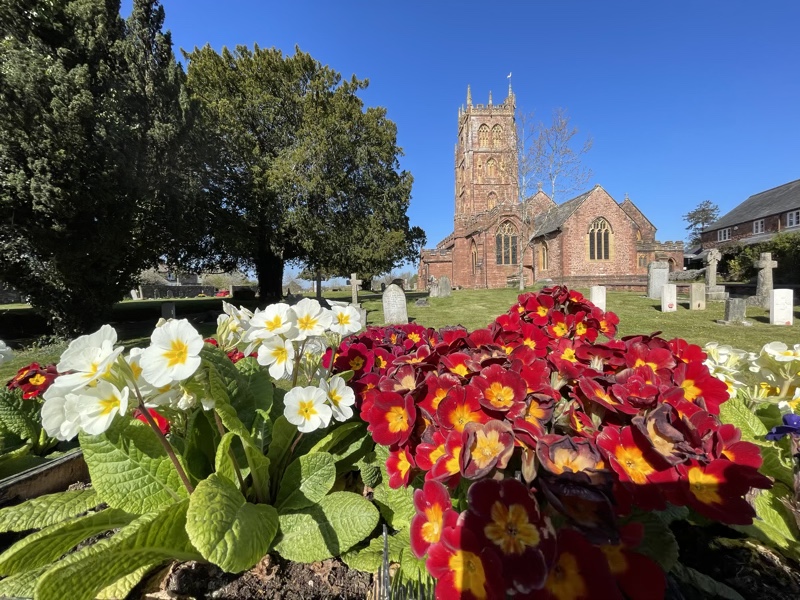
Which is... OK, and the flowers and church do indeed both have detail, thanks to the much higher DoF. But at this 4:3 aspect ratio and looking at the full frame, it looks like a wide angle shot and not that 'natural'. The trick is - you've guessed it - to crop the photo from the bottom, eliminating the section blocked out with my shadow. This restores a more familiar, more cinematic aspect ratio for what is essentially a landscape and reducing visual clues that it was shot with an ultra-wide lens:
Yes, if you look too closely then the clues (verticals, proportions, ground level) are still there. But for most purposes it's simply a lovely colourful photo with everything 'in focus'. (Shades of Nokia's EDoF system, eh?)
In summary, if you want shallow depth of field then the main lens can normally do well, whatever phone camera you have - and if you want even shallower DoF then various 'live focus' software tricks and 'portrait' modes are there. But if you want larger DoF for some reason (as here, with a landscape) then don't discount using an ultra-wide lens and sorting out the exact framing later on!
Again, you can find the full resolution (HEIC format) photo on OneDrive if you want to view it, analyse it, or simply use it, perhaps as a desktop background. (If you post it publicly, then an attribution and link would be appreciated.)
Thanks for reading, these photo walk 'stream of consciousness' articles do seem quite popular. Hopefully I've inspired you to head out and snap away for yourself, indeed the very act of analysing my own shots help improve my own abilities, I've found.